I love making pom poms. They are a fun way to decorate. You will find them in crochet patterns, knitting patterns, children’s crafts, and home decor. They are cute, fluffy balls that add texture, whimsy, and interest. If you have never made a pom pom before, you are probably wondering how to make yarn pom poms. Continue reading below to learn 4 different methods.
What is a Pom Pom?
A pom pom is a decorative ball or a bundle of thin strips. Pom poms are cute and fun. You can frequently find pom poms on hats, jewellery, children’s crafts, and home decorations. Pom poms are also used by cheerleaders.
Pom poms come in a wide variety of sizes and colours. You can make pom poms using an assortment of materials such as yarn, embroidery floss, cotton, paper, etc.
What are Pom Poms Used for?
You can use pom poms for a variety of purposes, including:
- Bookmarks
- Children’s Crafts
- Clothing
- Curtains
- Gift Bags
- Handbags
- Hats
- Jewellery
- Key Chains
- Macrame
- Pillows
- Quilting
- Rugs
- Tablecloths
- Tote Bags
- Wall Hanging
- Wreaths
- …and More
Fun Facts About Pom Poms
Have you ever wondered where the pom pom came from? Or maybe, how it got its name? Below are a few fun facts about pom poms.
- In the 18th and 19th centuries, European soldiers wore pom poms on their hats. The colour of the pom pom showed their regiment and rank.
- Sailors wore pom poms on their hats to stop them from bumping their heads when they were in tight spaces.
- During the Great Depression, pom poms were used as decorative pieces. They were easy to make with leftover yarn. So, families were able to create embellishments without spending any money.
- The name pom pom comes from the French word pompon. A pompon is an ornamental ball made from string, feather, ribbons, or wool.
- In some cultures, pom poms are used to denote a woman’s marital status. Depending on the country, it could be indicated by the colour or size.
4 Different Methods for Making Pom Poms
There are several ways on how to make yarn pom poms. You can use your fingers, items lying around your home, or a pom pom maker.
- What is a Pom Pom Maker?
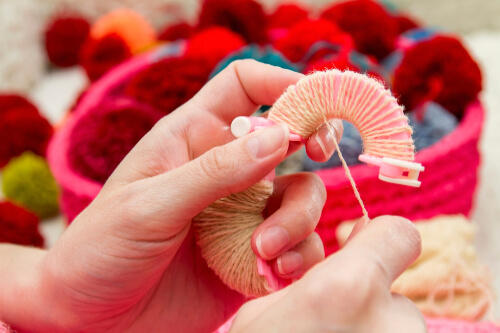
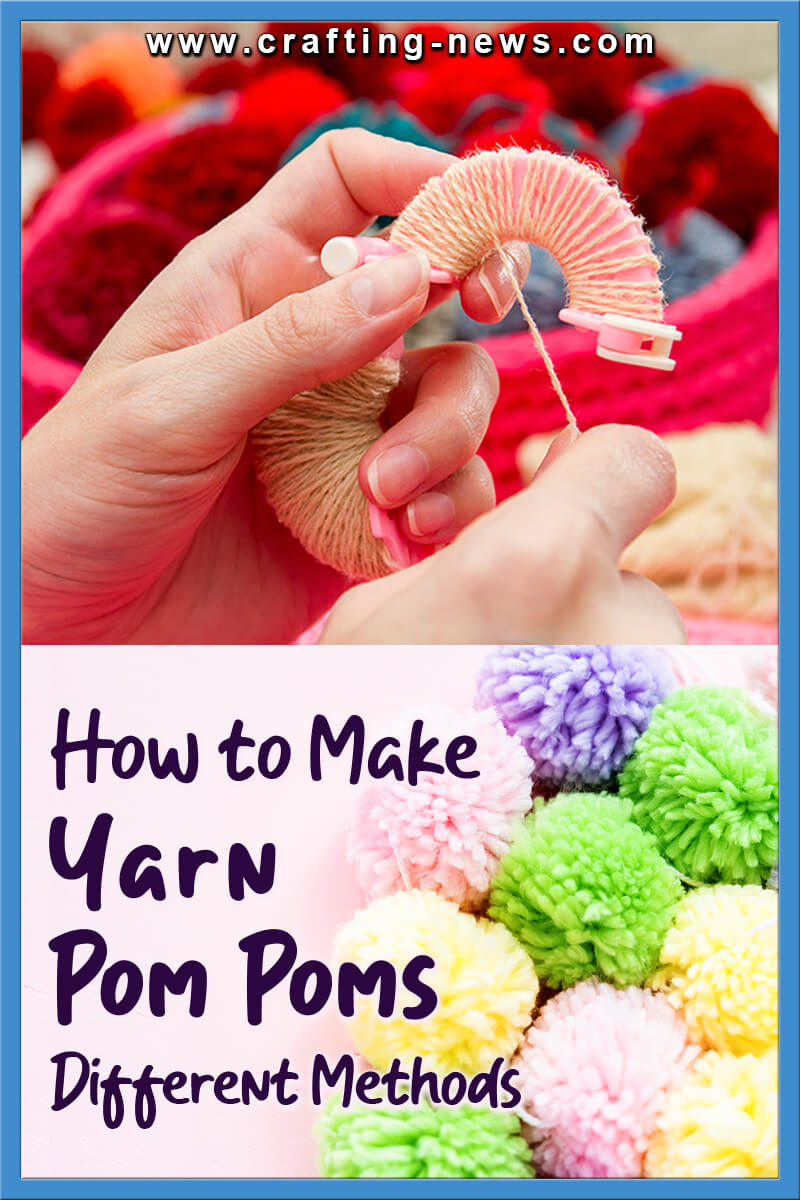
Pom pom makers are clever little crafting tools that make it easy to make fluffy little pom poms. There are different styles of pom pom makers. However, they generally work the same way. First, you open the tool and wrap a generous amount of yarn around both sections.
Then you close the tool and cut the yarn. To finish the pom pom, simply tie a piece of yarn around the pom pom, then open the tool. Check my review on the best pom pom makers here.
- How to Make Yarn Pom Poms Using a Fork
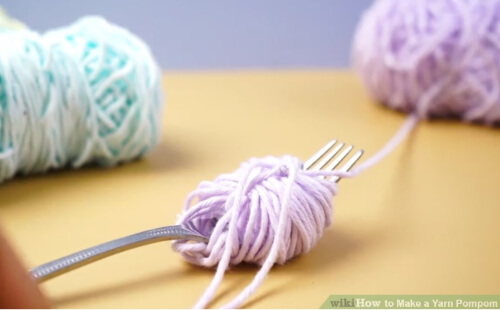
- Using a lightweight yarn, wrap it around the head of your fork about 50 times. Then cut the yarn from the skein/ball.
- Cut a 14 inch (35.56 cm) piece of yarn from your skein/ball.
- Use the yarn piece to thread your yarn needle.
- Insert the needle in the middle slot of the fork under the wrapped yarn.
- Remove the needle from the yarn.
- Tie the yarn piece tightly around the wrapped pieces.
- Slide the yarn off the fork.
- Take your sharp scissors and trim through all the loops.
- Fluff the pom pom.
- Trim the pom pom to make it round.
- How to Make Yarn Pom Poms Using Your Fingers
- Cut a long piece of yarn about 14 inches (35.56 cm) long.
- Place the yarn piece between your middle finger and ring finger. Half the yarn should lay on one palm of your hand and the other half on the back.
- Take your working yarn and start wrapping it around all 4 of your fingers (keep your fingers side by side). Using all 4 fingers will create a large pom pom. You can use fewer fingers, just make sure the first piece of yarn you cut is between the correct fingers.
- Continue wrapping the yarn around your finger until you have a thick amount of yarn. The more times you wrap the yarn, the thicker your pom pom will be.
- Now use the yarn that is hanging between your fingers to tie the wrapped yarn. Tie it tightly. This is very important. If you do not get it tight, the yarn pieces can slip out. You may have to slide the yarn off your fingers to get it tight. Make a double knot.
- Flip the pom pom over and tie that side as well with a double knot.
- Take your sharp scissors and cut through the loops of the yarn.
- Fluff up the pom pom.
- Trim the scraggly yarn pieces to create a uniform ball.
- How to Make Yarn Pom Pom Using Cardboard Discs
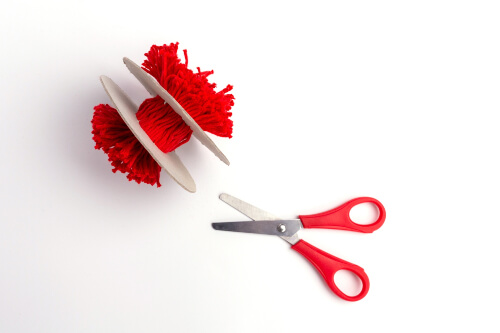
- Print off the pom pom template and trace it on cardboard and cut it out. You will need 2 cardboard pieces. You can find a free printable template HERE.
- Cut a long piece of yarn about 14 inches (35.56 cm) long.
- Place the yarn piece on top of one of the cardboard pieces. Lay one end on one of the points. Wrap the yarn up and over the inner circle and place the other side on the other point. The yarn should be in a C shape.
- Place the other piece of cardboard on top creating a sandwich. The slits on the cardboard pieces should line up.
- Start wrapping the yarn around the pieces of cardboard. Start at one side and work your way to the other, then work your way back. You can go back and forth as many times as you like. Make certain the tails of the thread that are running through the middle do not get wound up. They need to hang freely.
- Once you have the yarn wrapped around the cardboard pieces several times, cut the yarn from the skein/ball.
- Now take the 2 tails that are hanging down and slide them up to the center hole. Tie them together loosely.
- Take your sharp scissors and cut the wrapped yarn around the outside edge of the cardboard pieces. You can slip the tip of your scissors between the layers to make it easier. As you are doing this, place your finger/fingers into the centre hole and hold the yarn in place.
- Grab the tails of the center yarn and pull them tightly to secure all the yarn together. Make a knot.
- Remove the pom pom from the template and fluff it up.
- Trim any unsightly pieces to make the pom pom more uniform.
Tips for Making Yarn Pom Poms
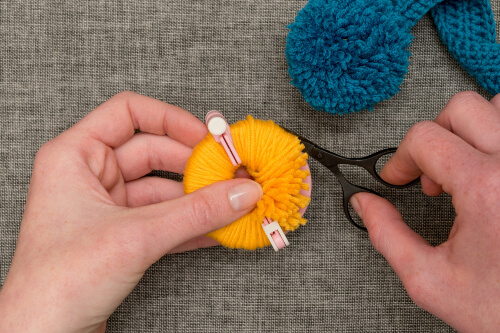
If you want to make the perfect pom pom every time, I have some tips for you.
- Leave Long Tails
If you are planning on attaching the pom pom to something, leave long tails. You can do this by using a long piece of yarn when tying off the centre.
- Use a Cat Brush
To get a super fluffy pom pom, use a cat grooming brush to fluff the yarn fibres.
- Make Sure Your Scissors are Sharp
When cutting your pom pom, you need to cut through layers of yarn. Using sharp scissors will create clean edges and make cutting easier.
- Do Not Skimp on the Yarn
You need to use a lot of yarn to get a dense pom pom. Wrap the yarn several times. If you are using thick yarn, wrap it at least 4 to five times. For thinner yarn, wrap it at least 6 to 8 times. If you do not use enough yarn, your pom pom will not be thick.
- Use a Trim Guide
After you make the pom pom, it will need to be trimmed to create a perfectly round ball. Using a trim guide will make it easy to get the flawless shape.
Learn How To Make Yarn Pom Poms Quickly by Following Our Step-by-Step Tutorials
Making yarn pom poms is simple and fun. If you are a knitter or crocheter, you will come across patterns that use pom poms all the time. Do not pass on the patterns because you do not know how to make a pom pom. Learning how to make yarn pom poms is super easy.
If you’re up for more craft-related articles, we have tons just for you:
- Ways On How To Shrink Polyester
- Scrap Fabric Projects
- Homemade Heating Pads
- Tutorials On How To Make A Lanyard
We hope you had fun learning how to make yarn pom poms.

