If you love to give handmade greeting cards, you may be interested in exploring different paper crafting techniques. Quilling is one of my favourites. Whether you are an experienced quiller or just learning, incorporating quilling into your cards is a unique way to add a special touch. Below you will find several paper quilling cards I hope will inspire you.
What Is Quilling
Quilling is a crafting technique that has been enjoyed for centuries. Even today, it remains popular. The art form is inexpensive and easy to learn. It involves using thin strips of paper to create intricate designs. With the help of a slotted quilling tool, the paper strips are coiled and shaped into various forms. The forms are then assembled into visually stunning patterns.
What Types of Greeting Cards Can You Make With Quilling?
With quilling, you can create a wide variety of unique and eye-catching greeting cards. Some popular types include birthday, thank you, wedding, anniversary, Christmas, and Valentine’s Day. The handmade, intricate, and delicate designs add a special touch which will make the cards extra special.
10 Quilling Greeting Cards
Do you enjoy card making? Are you ready to incorporate the art of quilling into your projects? If so, check out the 10 paper quilling cards below.
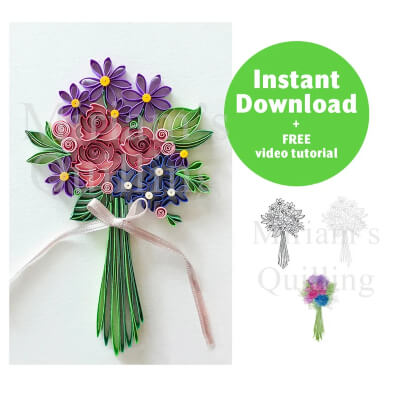
1. Quilling Bouquet Pattern from MiriamsQuilling
Transform a plain, ordinary card into a stunning floral masterpiece with this exquisite quilling pattern. Within this set, you will find three distinct backgrounds. Each includes guidelines which make attaching your paper strips effortless.
The black and grey images are sized at a resolution of 1350 x 1995 pixels. The coloured image can be used as a reference or used to add colour to your background. It is sized at a resolution of 2039 x 3134 pixels.
Find the Pattern from MiriamsQuilling Here
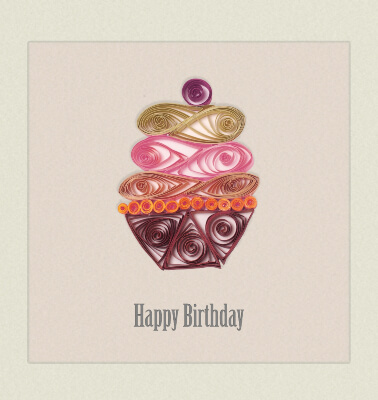
2. Cupcake Quilling Card Design from PaperZenShop
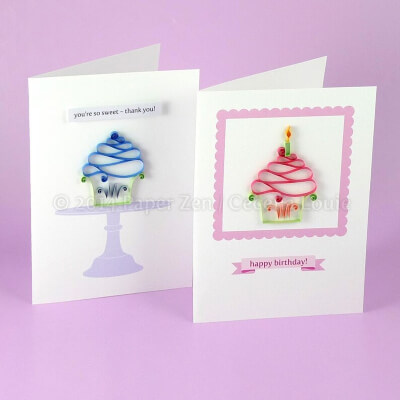
Craft a set of cute cupcake paper quilling cards with this simple, yet dazzling pattern. Using the printed templates, you can ensure your cupcake swirl looks consistent and flawless every time.
The PDF files contain everything you need to bring these whimsical greeting cards to life. You get clear and concise instructions, 4 printable card backgrounds, detailed photographs, and one customisable envelope. The editable text options ensure you can customise the cards and envelopes for your recipients.
Find the Pattern from PaperZenShop Here
3. Lavender Posy Quilling Paper Greeting Card from Card Inspirations
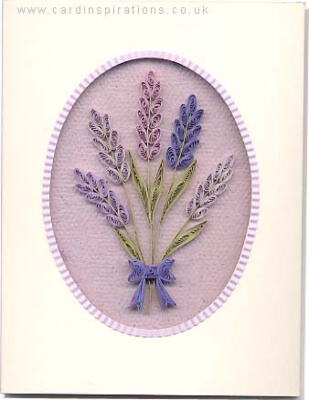
Adorned with a delicate lavender posy, this quilling design would make a wonderful Mother’s Day, birthday, or Easter card. Mount the flower on a soft, pale mauve backing paper and frame it in an oval card cutout to create a clean layout.
The lavender posy is made from standard 450 mm strips of paper 3 mm wide. The bow is shaped from 2 mm wide paper. To add depth to the flower, consider using different shades of mauve for each flower spike.
Find the Pattern from Card Inspirations Here
4. 5 Mini Patterns Christmas Quilling Cards from MiriamsQuilling
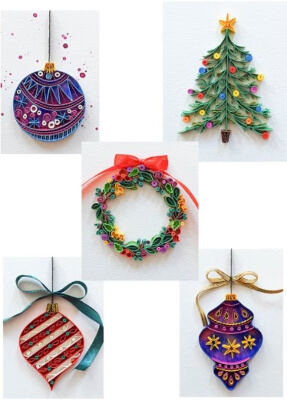
Included in this quilling set are 5 mini patterns, the perfect size for greeting cards. There are 3 Christmas baubles, a wreath, and a Christmas tree.
The digital download contains 5 JPEG watercolour prints and 5 images for reference. The watercolour prints make the quilling designs pop. There are also basic instructions, a materials list, and a YouTube video tutorial.
Find the Pattern from MiriamsQuilling Here
5. Congratulations Champagne Quilling Greeting Cards from PaperZenShop
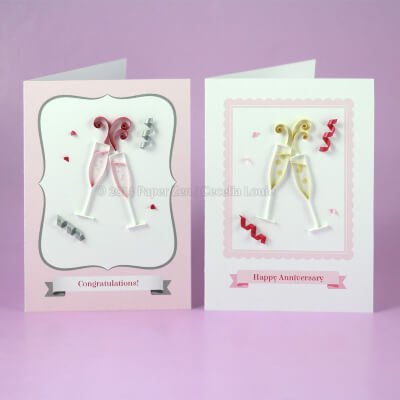
Celebrate life’s happiest moments with a glass of sparkling champagne. Whether it be for a wedding, anniversary, or New Year’s, personalised paper quilling cards are a fun way to celebrate.
The quilling pattern download includes step-by-step instructions, actual-size templates, and photos. The two card designs measure 4.5″ x 6.25″ (114.3 mm x 158.75 mm). Both cards and the envelope have editable text.
Find the Pattern from PaperZenShop Here
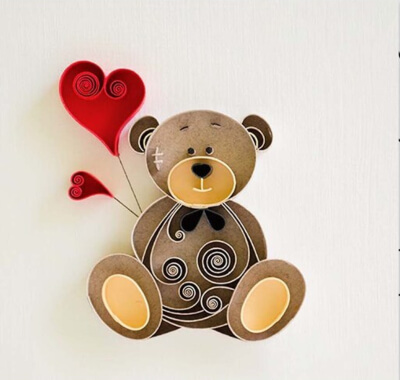
6. Bear Quilling Paper Art from LarissaZasadna
Perfect for a child’s birthday or a baby shower, this adorable little bear will bring a smile to your recipient’s face.
To create the teddy bear design, the designer recommends using paper with a density of at least 130 gsm. Included are two JPG and two PDF files. Each measures 5″ x 5″ (139.7 mm x 139.7 mm) making the design perfect for a square card.
Find the Pattern from LarissaZasadna Here
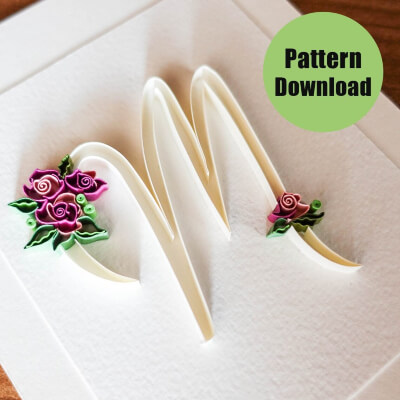
7. Mini Pattern Letter M Paper Quilling Card from MiriamsQuilling
Are you looking for an easy yet elegant quilling design for a wedding or anniversary? Consider monogram paper quilling cards. This card will make for a memorable keepsake that can be cherished for years.
This download contains three distinct images of the letter M. There is a light grey outline, a black outline, and a coloured version. You also get basic quilling instructions, a materials list, and a link to a YouTube video.
Find the Pattern from MiriamsQuilling Here
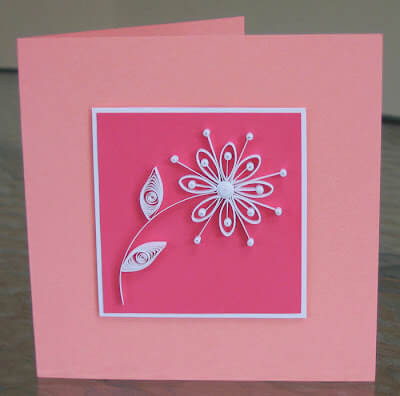
8. Quilled Retro Daisy Card Tutorial from All Things Paper
Impress your friends and loved ones with a handmade card featuring a quilled daisy. This Simple Quilled Daisy Card is the perfect choice for any special occasion such as birthdays, engagements, or holidays. The free tutorial provides easy-to-follow step-by-step instructions.
Find the Pattern from All Things Paper Here
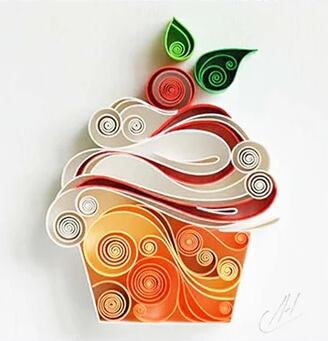
9. Cupcake Quilling Paper Greeting Card by LarissaZasadna
Add a touch of whimsy to your DIY greeting cards with this delightful cupcake design. The swirled, playful design is made using paper with a density of 130 gsm or more.
Included are two pattern JPGs sized 5″ x 5″ (139.7 mm x 139.7 mm), as well as two pattern PDFs. Both the JPGs and PDFs have dark and light lines.
Find the Pattern by LarissaZasadna Here
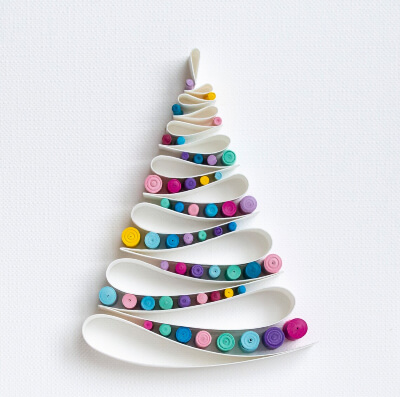
10. Christmas Tree Quilling Paper Greeting Card from LarissaZasadna
Put a creative spin on the traditional Christmas tree with this vibrant and artistic pattern. For the best results, the designer recommends using paper with a density of 130 gsm or more.
The ZIP file contains six JPG and six PDF files, each 5″ x 5″ (139.7 mm x 139.7 mm) with both dark and light lines. There is also a brief instructional video, as well as recommendations for paper and tools.
Find the Pattern from LarissaZasadna Here
Frequently Asked Questions About Paper Quilling Cards
What is the best type of glue for paper quilling cards?
When it comes to making paper quilling cards, it is very important to use the right type of glue. You want a glue that dries clear and will hold your quilling designs firmly in place. One of the best types of glue for paper quilling cards is PVA glue, also known as white glue. This type of glue is easy to find, affordable, and dries clear.
Do Paper Quilling Cards Require Extra Postage?
Extra postage is often required when mailing paper quilling cards. The quilling makes the card thicker than standard greeting cards and can also make it heavier. Cards that exceed the maximum weight or thickness require extra postage. Irregularly shaped cards and square cards also require more postage. If you are mailing paper quilling cards, it is best to check with your local post office to determine the correct postage.
How long does it take to make paper quilling cards?
The time it takes to make paper quilling cards will vary depending on the complexity of the design and the skill level of the crafter. Generally, simple quilling designs can be completed in just a few hours. While more intricate quilling designs can take several days to complete.
Can I use regular printer paper for quilling cards?
Regular printer paper can be used for practising quilling techniques. However, printer paper does not work well for paper quilling cards. Regular printer paper does not hold its shape well, and it can be difficult to work with. Text weight paper is recommended for quilling. It is heavier than printer paper and lighter than cardstock. It is easy to manipulate, and it holds its shape better.
What are the most common sizes of paper quilling cards?
The most common sizes for paper quilling cards are A7 (5” x 7” / 74 mm x 105 mm) and A2 (4.25” x 5.5” / 107.95 mm x 139.7 mm). However, the size can vary depending on the preference of the card maker or the occasion. Other sizes you may often see are A6, square, and mini.
With a little practice and creativity, you can create stunning paper quilling cards. The cards will impress your loved ones and make them feel special.
Making personalised paper quilling cards is a fun and unique way to show your creativity and thoughtfulness. With a little practice, patience, and the right tools and materials, you can make beautiful works of art your loved ones can cherish for years to come. So, the next time you want to send handmade greeting cards, consider making paper quilling cards.
If you are new to quilling, check out these articles: A Beginner’s Guide to Quilling, Paper Quilling Tools and 10 Quilling Templates, and Best quilling glues. You can also head on to our Facebook Page for more fun crafting projects.

