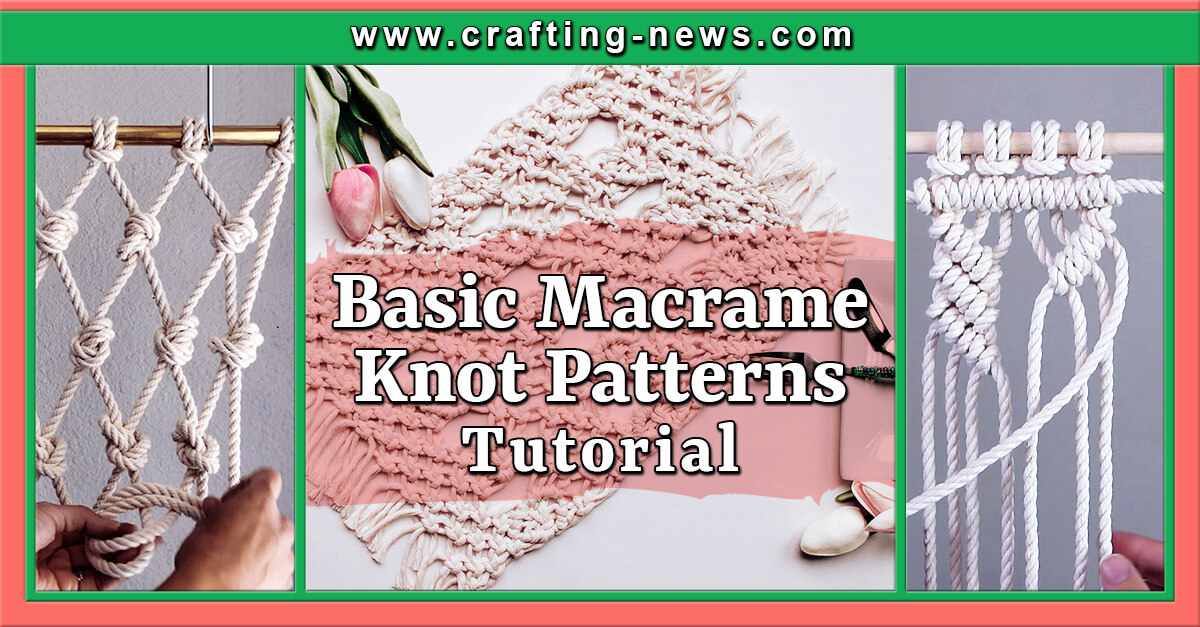
One of the trendiest ways in decorating homes and styling events is the use of macrame knot patterns in creating hand-crafted masterpieces.
Basic Macrame Knot Patterns Tutorial will teach you on how to begin with this crafting journey!
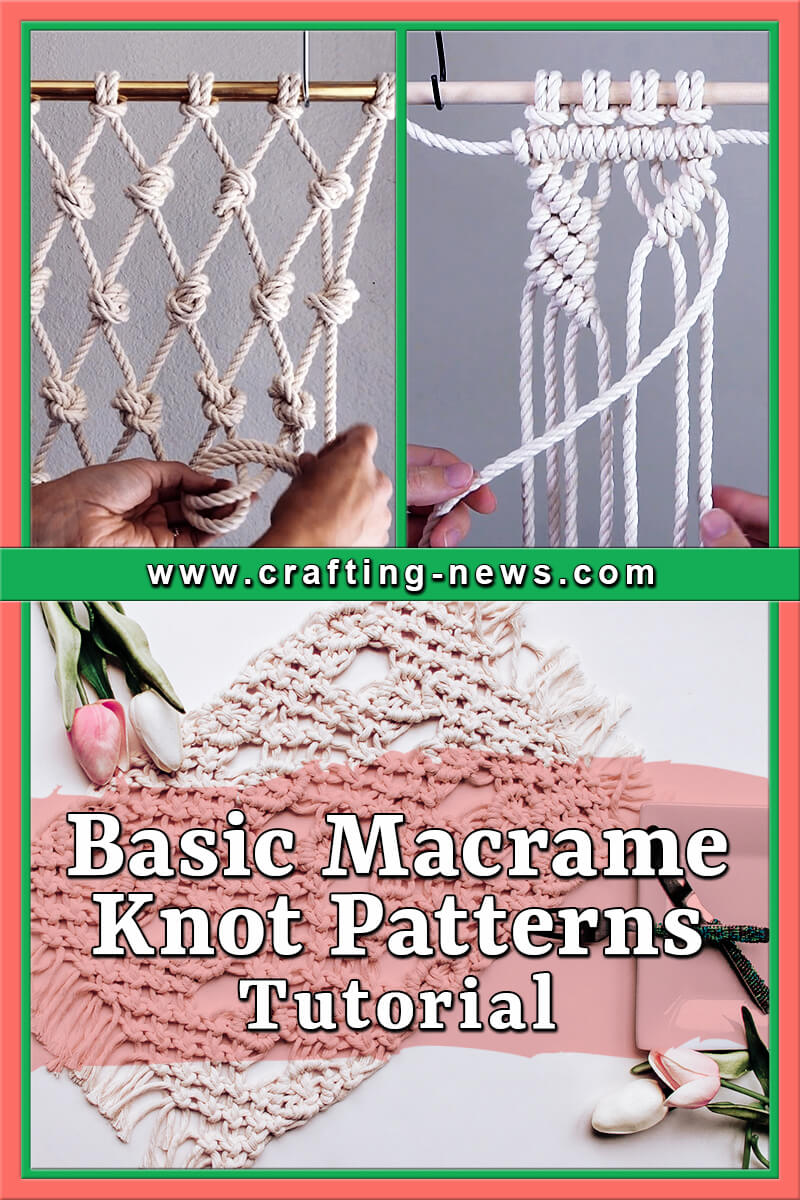
Macrame has been around for years, bringing comfort from its texture by putting knots together in a very explicit way possible. You can make skillfully designed wall hangings, curtains, headboards, plant holders and many more.
Making macrame knots is very easy to learn, you just have to know a number of knot-tying techniques to create your very own macramé projects!
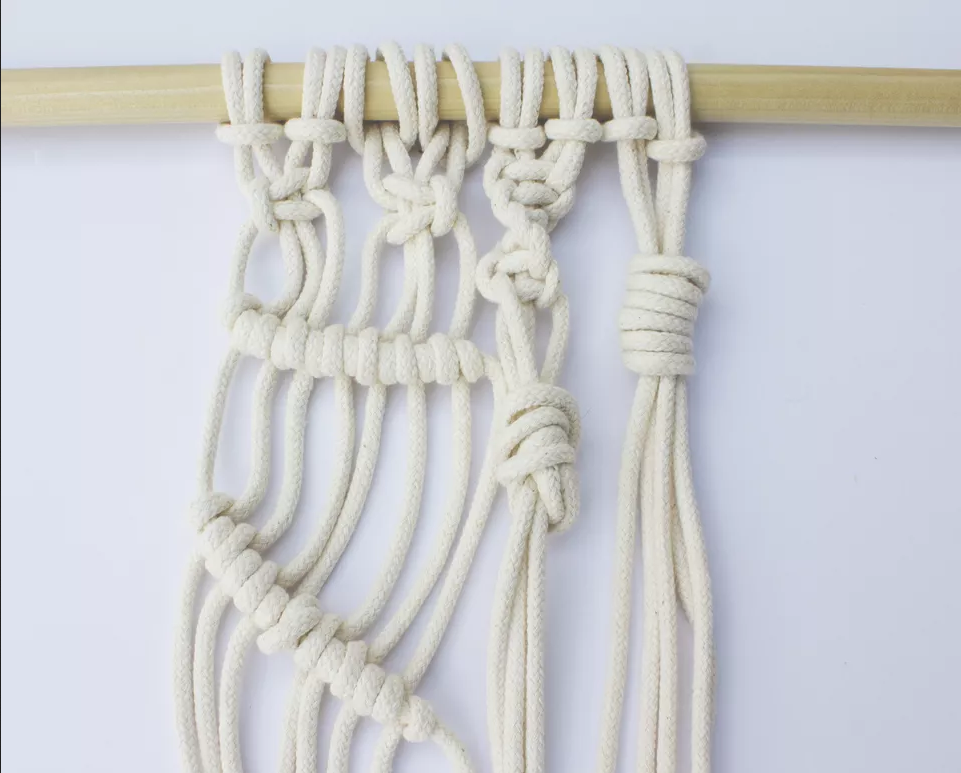
Basic Macrame Knot Patterns Tutorial | Written + Video
MATERIALS AND SUPPLIES FOR MAKING MACRAME
Learning how to make macramé crafts requires time and dedication. So, if you’re really eager to learn about the art of making macramé items, you need to gather and familiarize all the supplies needed and terminologies to be used in this art.
Here is a list of items you need to start making macramé crafts:
- Cord – Any kind of cord will do, such as twine, hemp, jute, ropes made out of cotton or synthetic materials.
- Support – You will be needing support to tie the knots into. Usual choices are dowel rods, branches, hoops, and rings.
- Scissors
IMPORTANT MACRAME TERMINOLOGIES
Familiarizing yourself with these macramé terminologies will definitely be a big help for you to understand the whole macramé craft.
- Working/Knotting Cord – These are the cords that you’ll be using to make certain knots.
- Filler/Knot-bearing Cord – These are the cords that you’ll be using to wrap your knots around.
- Sennit – These are repeated knots or set of knots.
BASIC MACRAME KNOT PATTERNS TUTORIAL
1. Lark’s Head Knot
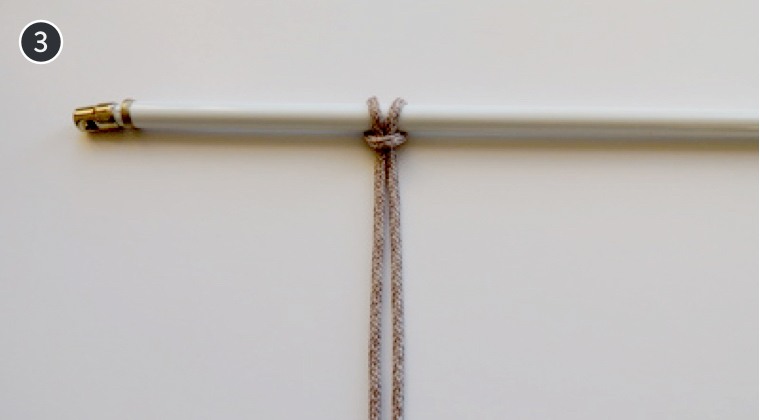
The lark’s head knot is also known as the “Cow Hitch Knot”. This is the knot that you’ll do to attach your macramé cords to a support, such as a dowel, branch or anchor cord.
- First, you need to fold your cord in half. Then, place your loop over the support.
- Next, take your loop around the back. Then, for it to be tight, pull the ends of your two cords through the loop.Remember that when making the Lark’s head knot, the “head” must be facing you, with the two cords at the back.

2. Reverse Lark’s Head Knot
A Reverse Lark’s Head Knot is done on the opposite side of your lark’s head. This is used to hide the bump to the back of the knot.
- Begin with folding the cord in half. Then, place the loop under the rod dowel or whatever support you are using.
- Next, put the loop round in front then, pull both ends of the cords throughout the loop for it to be tight. The finished knot should have the cords to the front, with the “head” hidden at the back
3. Square Knots and Half Knots
Square knot – is one of the most commonly used macrame knots. It can be made left facing or right facing. Depends mainly on the side where you started.
Half knot – from the word itself is just the half of a square knot. This can also be right facing or left facing. Also, depends mainly on the side where you started.
At least 4 cords are needed to make a square knot. This includes 2 working cords and 2 filler cords. Sometimes, you can use more. The working cords are the first and last cords. Let’s name it working cord 1 and 4.
Then, the filler cords are the cords in the middle and we’ll call those 2 and 3. As you make the knots, the cords will switch places, but they will still keep their initial numbering.
- Left Facing Half Knot and Square Knot
The left facing square knot has its vertical bump placed on the left side of the created knot.
- Pick up working cord 1, then shift it to the right, above the middle filler cords 2 and 3 and under working cord 4. In short, put cord 1 above cords 2 and 3 but beneath cord 4.
- Get working cord 4 and shift it to the left beneath two filler cords and above working cord 1.
- To tighten, pull both working cords while making sure the filler cords are straight. This is now a left facing half square knot.

- The working cords have now exchanged places. Working cord 1 is now on the right and working cord 4 on the left. Now, get working cord 1 and bring it to the left over the two filler cords and below working cord 4.
- Get working cord 4 and shift it to the right below the two filler cords but above working cord 1.
- To tighten, pull both working cords, maintaining straightness of the filler cords. This is now the left facing square knot.
- Right Facing Half Knot and Square Knot
The vertical bump is on the right side of the finished knot, that is what a right facing half knot and square knot is.
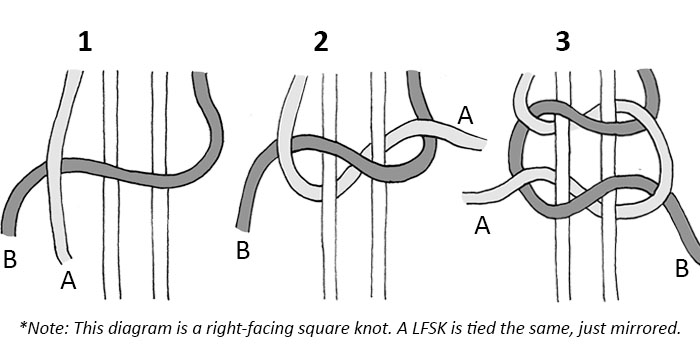
- Get working cord 4 and shift it to the left, above the filler cords 2 and 3 and below working cord 1.
- Working to the right, place working cord 1 below the filler cords. Then, above cord 4.
- To tighten, simply pull both cords maintaining everything straight. Now we have a right facing half square knot.
- All working cords have now different places. Working cord 1 is on the right and working cord 4 is on the left.
Get working cord 4 and place it on the right, above the filler cords and beneath working cord 1. - Get working cord 1 and shift it to the left, moving beneath the filler cords and above working cord 4.
- Pull both working cords for a tight end. You now have a right facing square knot!
4. Spiral Knot
The spiral knot, also known as the “Half Knot Sinnet or Half Knot Spiral”, is an array of half knots that forms a spiral.
Approximately 4 cords are needed to make a spiral knot – 2 working and 2 filler cords. Let’s number these cords 1-4 starting from the left to the right.
Cords 1 and 4 are the working cords and cords 2 and 3 are the filler cords. You can either start from left to right depending on where you want to begin.
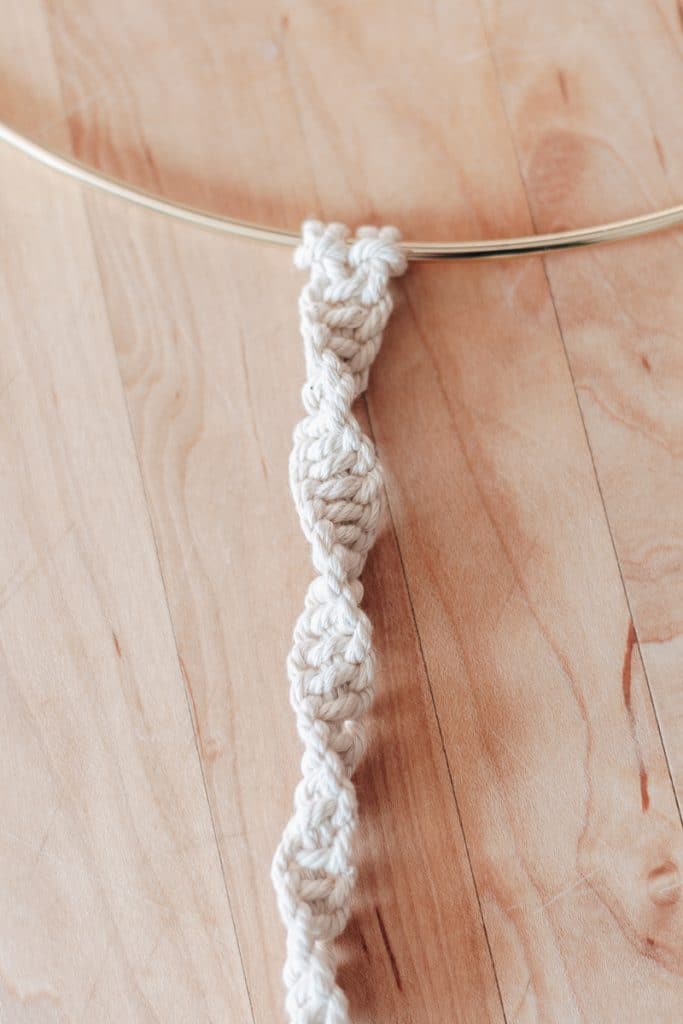
- Get working cord 1 then place it to the right, above the filler cords but below working cord 4.
- Shift working cord 4 to the left, going beneath the filler cords but above the working cord 1.
- To tighten, make sure to pull both cords around the filler cords.
- Continue making lots of half knots following the steps above. While working, you will see these half knots forming a spiral shape.
5. Clove Hitch Knot
The Clove Hitch Knot forms the lines in your works. It is also known as the “Double Half Hitch”. This knot can be worked horizontally, diagonally, and even vertically.
- Horizontal Clove Hitch Knot
The Horizontal Clove Hitch forms an array of knots that goes transversely into your macrame pieces. In doing this macrame knot pattern, the first cord will be you filler cord and rest of the cords are working cords.
- Get your left cord and the filler cord. Then, hold it horizontally just across all the other cords.
- Take your first working cord then bring it towards the front, above, and around the filler cord going to the left. Make sure you’ve formed a counter-clockwise loop.
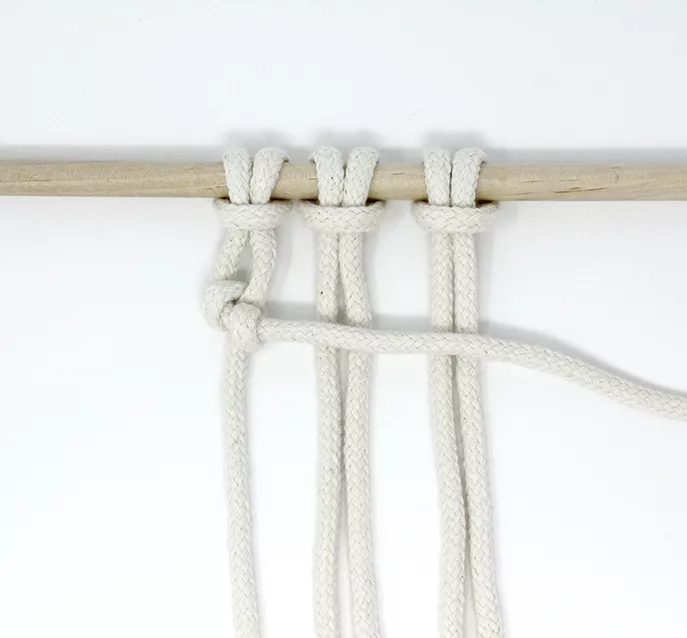
3.Get the same working cord then take it up to the right of the first knot, above, and into the loop. Now, there should be two knots beside each other. You have now made a horizontal clove hitch knot.
4. Continue making the clove hitch knots by making use of the next working cord going around the same filler cord. Repeat steps until you have the design your aiming for
- Diagonal Clove Hitch
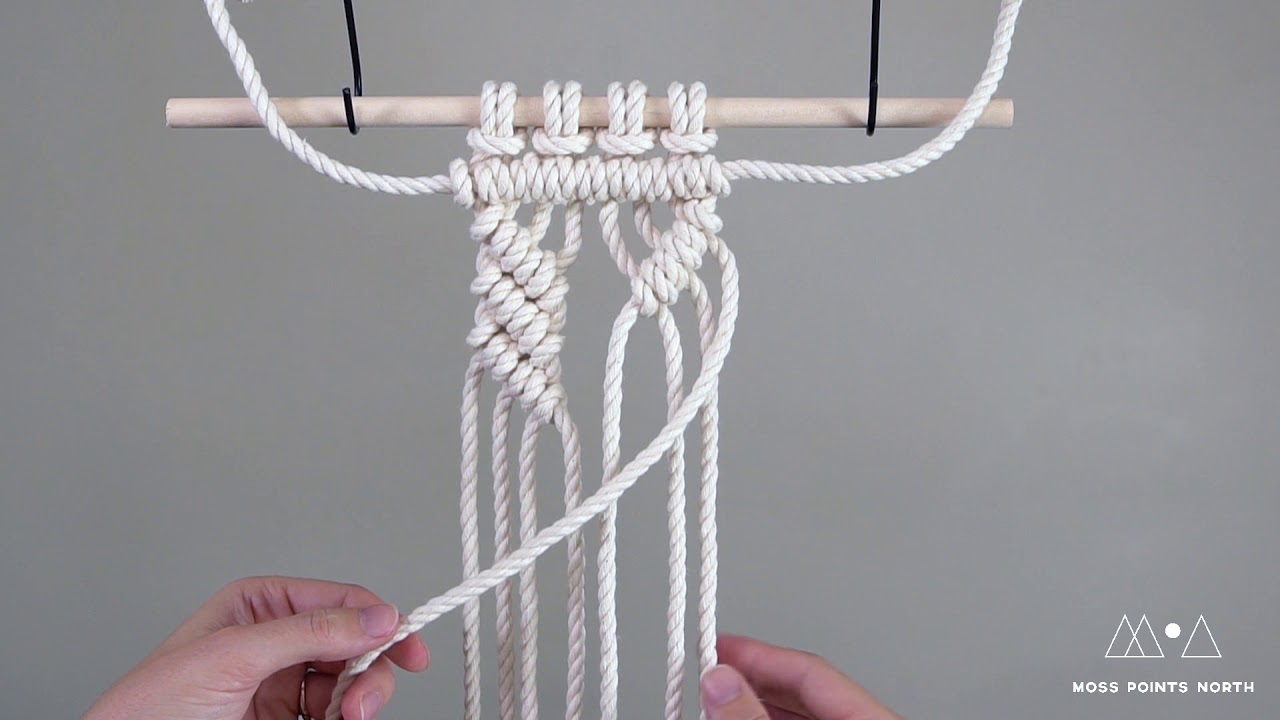
The diagonal clove hitch is simply a series of diagonal knots.
- Grab the cord on the left, the filler cord, and grasp it diagonally crossing the other cords.
- Then just follow steps 2 through 4 of the horizontal clove hitch mentioned above, shift diagonally instead of crossing straight. Continue until you have the desired look you want.
6. Double Half Hitch Knot
The double half hitch knot is a clove hitch knot repeated twice.
- Begin with a Lark’s head knot.
- Using the first cord as your holding cord in the left side, put it on top of all the other cords, either horizontally or diagonally.
- From left to right, make a half hitch with the second cord. Wrap cord 2 over and under cord 1, then over cord 2 again to form a loop.
- Pull the knot to tighten. Then, push the knot to where you want your starting point.
- Make another half hitch knot.
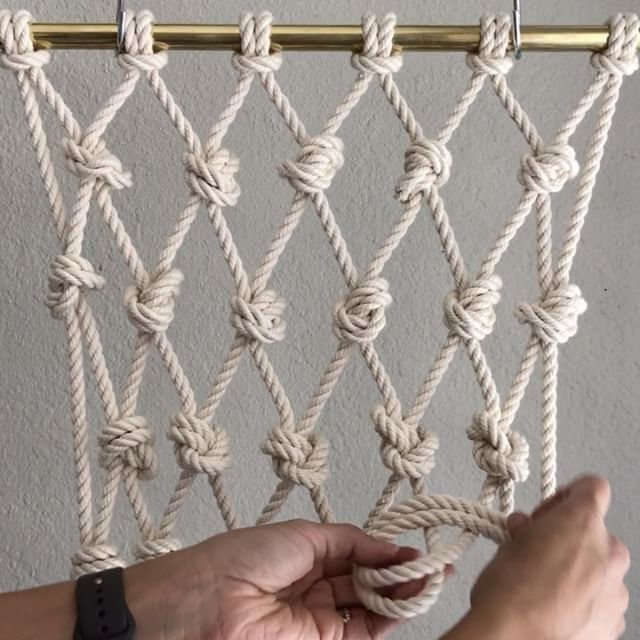
7. Overhand Knot
The Overhand Knot is simply a basic knot that binds several cords all together.
- Bend the cord into a loop to form a loop with two cords.
- Pass through the ends of the cords through the loop to tighten.
8. Alternating Square Knot
Alternating Square Knots are used in macrame projects to create a net-like pattern. To create an alternating square knot pattern, you will need to work with a multiple of four cords.
Example: 12, 16, 20, etc. For this example, we will use 12 cords.
- Tie your first row of square knots. Each knot will have a group of 4 cords. Each set will have two working cords and two fillers. You will end up with 3 square knots.
- Start making your square knots in row 2, by using cords 3 and 4 from the first group and cords 5 and 6 from the second group. The next knot will use 7 and 8 from the second square knot and 9 and 10 from the third knot. You will end up with 2 square knots.
- Repeat steps 1 and 2 until you get your desired length. The knot pattern will be 3,2,3,2 and so on.
9. Barrel Knot
The Barrel Knot is a basic macrame knot that is often used to finish a project and secure cords.
- Take the bottom of the cord and wrap it under the top of the string forming a loop.
- Place the working end through the front of the loop.
- Pull it through the loop 3 times (or the desired number), wrapping it around the side of the loop.
- Pull the working end downwards to tighten the knot.
10. Long Barrel knot
The Long Barrel Knot is made the same way as the barrel knot. To make it long, you wrap the cord through the loop more times. The more times you wrap the cord, the longer the barrel knot will be.
11. Gathering Knot
A gathering knot is also referred to as a macrame wrapping knot. It is used to secure a group of bundled cords. This technique is often used on DIY macrame plant hangers.
- Take a small piece of cord and fold it over the end to make a loop.
- Place the loop on the front of the cords you are going to gather.
- Wrap the long end of the cord around the cords you are gathering while holding the loop in place. Start at the top and work your way down. Leave a small tail at the top sticking out.
- Wrap it as many times as you need to get your desired length.
- Take the end of the working cord and run it through the opening of the loop.
- Hold the working end tight and begin pulling on the tail of the cord at the top of the wrap.
- Once the knot begins to form, allow the working end to pull underneath the wrapped cord.
- After the knot is secure under the wrapper cord, pull both ends of the string to tighten it.
- Cut off any excess cord.
12. Vertical Clove Hitch Knot
The Vertical Clove Hitch forms a long column of knots. The knots are often used to add designs such as leaves or flowers into DIY macrame designs.
- Attach the desired number of cords to your dowel using the lark’s head knot.
- Take the working cord and place it horizontally under the first hanging cord on the left. Leave a 2-3” tail on the left of the project.
- Take the tail and fold it over and back under the first hanging cord on the left. Do this under the long working cord you placed in step 2.
- Slide the working cord and wrapped tail up to the top, as close to the dowel as possible. Keep the cord tight.
- Take the working cord and drape it over the first filler cord (hanging cord) on the left. This should resemble a backward 4.
- Pull the end of the working under the hanging cord and up through the opening of the backward 4.
- Hold the tail with one hand, so it stays tight. With your other hand, take the working cord and pull it taut up towards the dowel.
- Place the working cord under the next cord and create another backward 4.
- Hold the filler cord tight with one hand. Use your other hand to pull the working cord tight.
- Repeat the backward 4 twice on each cord.
- Once you reach the end, you can work your way back. Instead of wrapping the working cord from the right to left making a backward 4, wrap it left to right creating a forward 4.
13. Vertical Lark’s Head Knot
The vertical lark’s head knot is also referred to as the buttonhole stitch. It is made by tying two loops separately.
- Take your working cord and wrap it around the front of your lead cords. Put it around the back and pull it up and over the working cord.
- Wrap the working cord behind the same lead cords. Pull the end through the loop that you created.
- Pull the working cord taut to tighten the two loops together.
ADVANCED MACRAME KNOTS TUTORIAL
1. Berry Knot
Berry knots are used to give projects a “pop” and make designs stand out.
- Attach 4 strands of cord onto your dowel using the lark’s head knot.
- Your four middle cords are working cords. Using these cords, make 3 consecutive square knots.
- Take the end of the third cord and put it through the loop created on the right above the first square knot.
- Take the end of the second cord and put it through the loop created on the left above the first square knot.
- Now take both of those cords from behind and pull them down tightly. This will roll the 3 square knots into a ball.
- Tie one square knot under the “berry” to secure the knot.
2. Crown Knot
The Crown Knot is often used when forming woven patterns. They can be found in all types of DIY macrame patterns from plant hangers to belts, ornaments, jewelry and more.
Crown knot macrame patterns usually use different colours of cords to get a striking effect.
- Take two cords and cross them in the center to form an X.
- Secure the centers together. This gives you 4 working cords.
- Think of these as A, B, C & D in a counterclockwise direction (or clockwise).
- Take A and fold it over B. Leave an open loop where the 2 cords meet.
- Then take B and fold it over A & C.
- Next, take C and fold it over B & D.
- Take D and fold it over C & A and place it through the loop made in step 4.
- Tighten the knot slowly by pulling on each end separately. Make sure you get the knot as close to the center of the cords as possible.
3. Josephine Knot
A Josephine knot is also known as a double coin knot. The Josephine Knot in Macrame is used for decorative purposes in DIY macrame patterns.
- Take the second cord and form a circular loop.
- Place the loop over the first cord. Hold it in place with the first cord running down the center of the opening behind the loop.
- Take the end of the first cord and place it over the top of the second cord.
- Pull the end through the back of the V-shaped opening located at the top of the loop between the two cords.
- Now take the end and pull it down through the right-hand section of the loop and back up through the left-hand section.
- Pull the cord through until it starts forming your Josephine Knot. Then pull on both strings until you get the look you desire.
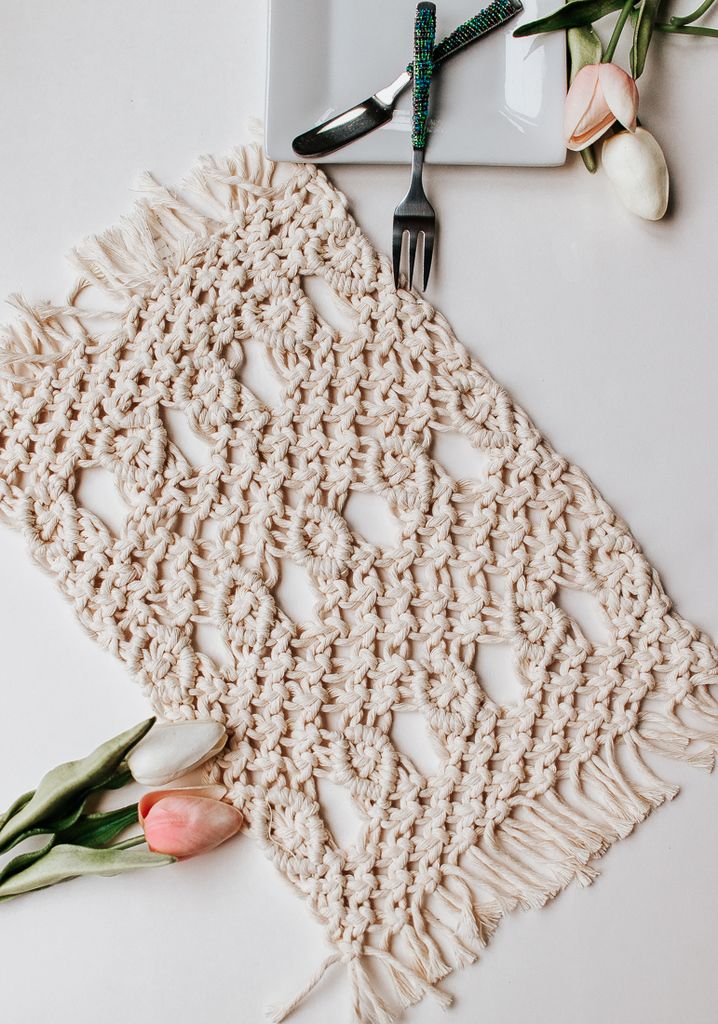
FREE RUSTIC PLACEMAT PATTERN USING MACRAME BASIC KNOTS
So, now that you’ve learned macrame knot patterns, the next step is to gather your materials and start picking easy macrame patterns like this one!
Try out what you’ve learned from the Basic Macrame Knot Patterns Tutorial | Written Tutorial above.
MATERIALS FOR THE PLACEMAT
- Cord
- Scissors
- Hanger for as your support
MACRAME KNOTS YOU WILL USE
- Lark’s head knot
- Square knot
- Double half hitch knot
The Free Rustic Placemat Pattern is the perfect way to start your macrame journey! It’s easy. Once you get the hang of it, you can make other placemats using other macrame knots too!
Macrame is a great hobby for stay at home moms and grandmothers. You can also give these crafts as gifts! Share your crafts and masterpieces on our Facebook Page.
If you’re up for more macrame-related articles, you can check out our reviews for the Best Macrame Beads and Best Macrame Boards for your Macrame Projects.
Here are Macrame projects you can make:
- Macrame Hanging Chair Patterns
- Macrame Door Curtain Patterns
- Macrame Plant Hanger Patterns
- Macrame Wall Hanging Patterns
- Kids Macrame Projects
It’s quite rewarding to be recognized from the craft you’ve made with this Basic Macrame Knot Patterns Tutorial!

