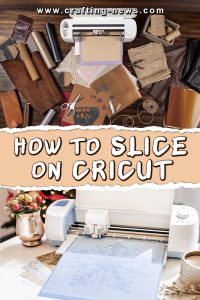
If you own a Cricut and use Cricut Design Space, you have probably seen the slice tool option. But what is it? And why would you want to use it? If you are new to using the tool it can be confusing.
We will show you the importance of this option and how to slice on Cricut.
Why Would You Need the Slice Function?
There are several instances when the slice function would come in handy. The slice tool is a fun feature that allows you to create all types of fun designs.
- If you want to cut a shape from another shape
- Create your own shape.
- Crop or remove unwanted elements of a shape.
- Make duplicates.
- Cut text from a shape.
What Do You Need?
There are a few things you will need before you can slice with your Cricut.
These include:
- Cricut Machine
- Cricut Design Space
- Cutting Mat
- Paper or Vinyl
- Images
What Does the Slice Function Do?
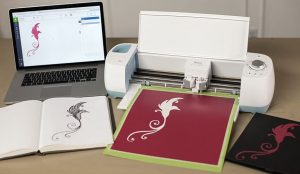
The Slice tool is a handy tool that separates two overlapping images or text into separate pieces. By selecting the slice tool, you are creating a new cut path. This can result in several new shapes. These new shapes will be visible as separate layers.
The Slice Tool Can be Finicky
Learning how to use the tool can be frustrating if you do not know the basics. The most important thing you must remember is you can only slice two shapes at once.
Important things to remember:
- The tool will be greyed out if there are more than two things selected.
- Hidden layers will be removed. If you want to use them, you must unhide them.
- You can only work with two layers at a time.
- You must hide or ungroup multilayered images.
- Text does not have to be ungrouped.
- There will be 3 images generated. You can delete the extra images.
Common Questions When Using the Slice Tool
- Why is the Slice Function Greyed Out?
The most common reasons the slice function is greyed out are you only have one image selected, or you have more than two.
- Why Can I Not Slice Text?
You can slice text. However, to do so, you must weld the letters together or cut each letter one at a time.
- How Can I Slice Multiple Layers?
At this point in time, you can only slice on a single layer.
- Can I Use My Own Images?
Yes, Cricut Designs Space gives you the ability to upload your own images.
- Can I Crop an Imagine?
Yes, cropping is very simple to do. Just create a square and place it over your image. Select both images and click the slice tool. Using a circle will also give a nice effect.
- How Can I Slice Multiple Images at Once?
The only way to slice multiple images is to slice each one separately or weld the images together.
How to Slice on Cricut
Step 1: Choose 2 images and arrange them so they overlap and create the effect you want.
Step 2: Select both the images. A box will appear around the images, and the slice tool will now be active.
Step 3: Click on the Slice tool.
Step 4: Separate the individual pieces and delete the ones that you no longer need.
Step 5: If you need to perform any more slicing on the image, you can do so now. Just remember, you can only work with 2 images at a time.
We hope that we made the process of how to slice on Cricut easier to understand.
You may also want to check on How to clean your Cricut mat effectively.
The slice tool is simple to use after you understand the basics. You can create your own designs and manipulate current designs. Once you learn how to slice on Cricut, you can let your imagination run wild. The possibilities are endless.


