Kids as well as adults have taken pieces of paper and made paper airplanes or tiny footballs. We all played around with folding paper. But have you ever tried to make claw origami?
Paper claws are an economical way to make accessories for Halloween or cosplay. So, you are probably asking yourself how do I make a claw? Continue reading to learn how to make an origami claw.
Below is my step-by-step tutorial, to learn how to make an origami claw. I have also included 10 additional tutorials you can practice with.
What is Origami

Origami is a crating technique that has been around for centuries. It is also referred to as orikata. It is the art of folding paper. People around the world enjoy making pieces of artwork by simply folding paper.
The origins of origami can only be traced back to the 15th century. However, it was practiced even before that. You can make almost anything using origami.
There are patterns to make animals (birds, butterfly, dogs, cats), cartoon characters, claws, and more. If there is something you want to make, I can almost guarantee you can find a pattern for it.
How to Make an Origami Claw Instructions
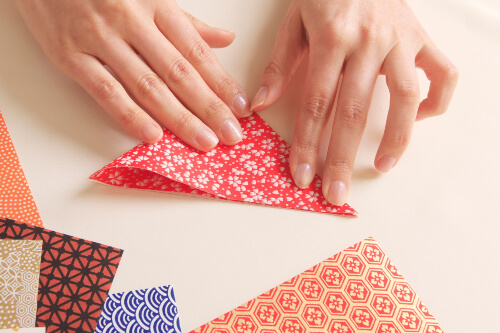
Before you begin, you will need a few basic supplies:
- 10 pieces of A4 sized paper
- Bone Folder (optional). Use this to make the folds crisp.
- Instructions
How to make an origami claw:
1. Start by laying your paper down vertically on your work surface.
2. Fold the top right corner down towards the left hand side. The top edge should line up with the left edge. Crease the fold.
3. Take the top left corner and fold it down to the right hand side. Crease the fold. The two folds you just created will make a triangle on top of a rectangle.
4. Take the lower left corner and fold it up to the bottom edge of the triangle. Crease the fold.
5. Take the lower right corner and fold it up to the bottom edge of the triangle. Crease the fold.
6. Take the bottom piece and fold it up and over the top triangle. Crease the fold.
7. Take the right bottom corner and fold down, directly under the top point. Crease the fold.
8. Take the right side and fold it over the fold you just created. Crease the fold. You will now have an arrowhead shape.
9. Fold the right hand side over one more time so it lines up with the left hand side.
10. Flip your piece over so that the long narrow point is aiming down, and the longest edge is on the left.
11. Take the front section of the top point and fold it down. Crease the fold and unfold it.
12. Open the piece so the arrowhead shape has the two points aiming upward. Take the section you just folded and unfolded and fold it down. Crease the fold and unfold it.
13. On the left hand side there is a pocket. Take the tip of the right hand side and slide the point into the pocket. Work the paper down into the pocket and fold the crease.
14. That is all there is to it. To apply the claw, insert your finger into the pocket, in the center, of the other tip.
Below are 10 fun projects that will teach you how to make an origami claw.
1. How to make a paper Cat’s Claws?
Learn how to make origami claws with this free video tutorial. The claws would make a great accessory for a kitty cat Halloween costume.
These cat claws are easy to make. They start with an 8 cm (3.15 in) x 8 cm (3.15 in) piece of black paper. You may need to play around with different sized pieces of paper to make the perfect fit for you or your children.
Find the Tutorial by PaperART 013 Here
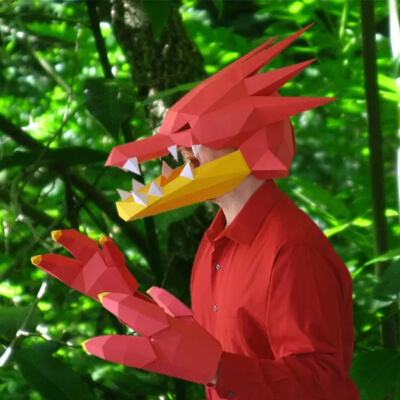
2. Dragon Claws or Dinosaur Claw Origami Pattern by TetraVariations
Are you building a dragon costume? You can make the claws from paper, card stock, or cardboard using this PDF template.
Completed, the claws are designed to slide on easily. They are also hinged to move with your fingers. The PDF how to make origami clay PDF template includes 2 sizes: average adult and child.
Find the Pattern by TetraVariations Here
3. Dragon Claws 3D Papercraft Pattern by Wintercroft
These PDF plans will show you how to turn cardstock into a pair of Low-Poly dragon claws. The fingers and thumbs have flexible joints.
To make the claws, simply print the templates on regular paper, stick the templates on cardstock, and cut them out. Then match the numbers and join the edges together. The monster claws are scaled to fit an adult. However, the pattern can be scaled down for a child.

Find the Pattern by Wintercroft Here
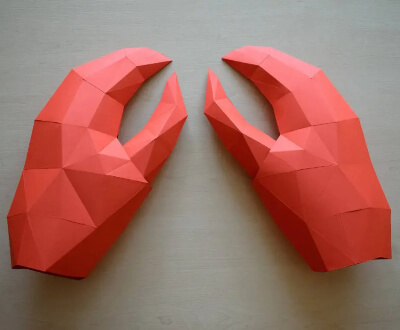
4. Lobster Claw Origami Pattern by Paperstatue
Are you looking for a fun project to make for a seafood themed party or a decoration for a restaurant? Check out these lobster claws. Not only can you wear these claws, but you can also use them as display pieces.
To make the claws you will need a printer, thick paper, scissors or a utility knife, and glue. The how to make an origami claw pattern is an intermediate level pattern. It will take about 3 hours to complete.
Find the Pattern by Paperstatue Here
5. How to make paper Witches claw
Are you looking to take your witch costume up a level? Why not make these witches claws? The project is fun to work on and the how to make an origami claw tutorial is free!
If you are making claws for both hands, you will need 10 pieces of black cardstock cut to 5.9 inches (15 cm) x 5.9 inches (15 cm). The claws are designed to fit average size adult fingers. But kids will definitely want to play with them too.
Find the Tutorial by NGS Creator Here
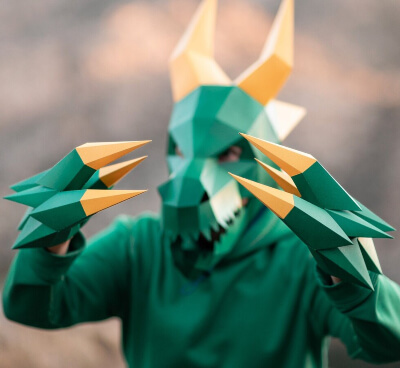
6. DIY Dragon Claw Origami Pattern by hekreations
Make a set of 3D dragon claws out of paper or cardboard. This template is composed of 26 pieces. Once assembled, the claws will measure 6.8 inches (17.4 cm) x 6.5 inches (16.6 cm) x 11.6 inches (29.6 cm). Included with the how to make an origami claw PDF is a link to the video tutorial.
Find the Pattern by hekreations Here
7. How to Make Extra Long Creepy Spider Claws
This free how to make an origami claw video tutorial will show you how to make long creepy spider claws. The claws are made by folding 10 inch (25.4 cm) squares of paper. You can use printer paper, newspaper, or cardstock. The claws are super easy to make and fun to wear.
Find the Tutorial by JeremyShaferOrigami Here
8. Easy Origami Wolverine Claws
Are you a fan of the Marvel character Wolverine? Now you can sport your own set of Wolverine claws. The claws are perfect for cosplay, Halloween, or just for fun. This is an advanced beginner pattern. If you are new to origami, you may need to watch portions of the video a few times. But the results will be worth it.
Get the Tutorial by TLT Lab Hacks Here
9. Easy Origami Paper Sorcery Nail
Are you looking for a way to keep your children entertained? Make them some colourful paper nails. The nails are super simple to make. You can work up a set in no time at all.
Find the Tutorial by IJ Origami & Craft Here
10. How to Make Paper Bear Claw Step by Step
Follow along with this step-by-step video tutorial to learn how to make bear claws. To make a full set of claws you will need to start with 10 pieces of cardstock cut into 2.36 inch (6 cm) x 2.36 inch (6 cm) squares.
Find the Tutorial by Gary Easy Origami Here
Are you looking for an economical way to add claws to your costume. Follow along with the above tutorial to learn how to make an origami claw.
The art of origami is a lot of fun. There are so many enjoyable projects from simple designs to complicated masterpieces. If you are just learning the art of origami or are looking to add some fun accessories to your costume, I hope my how to make an origami claw tutorial has helped you create your first claws.


