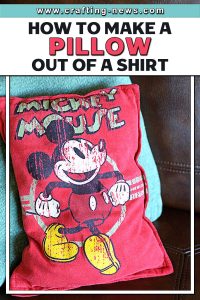
If you are looking for a fun project you can make quickly, learn how to make a pillow out of a shirt. This sewing project is so easy, the kids could do it too!

Do you, your partner, or your kids have old shirts that you can no longer wear? Maybe you have been thinking about throwing them away, but you just do not have the heart to do it?
Do they have sentimental value, or are they just too cute to get rid of? Instead of getting rid of old t-shirts, learn how to make a pillow out of a shirt.
T-shirt pillows are easy and fun to make. They are a project that people with beginner level sewing skills can master. If you are looking for a fun project you can make quickly, learn how to make a pillow out of a shirt.
Why You Should Learn How to Make a Shirt Pillow
There are many reasons that people learn how to make a pillow out of a shirt.
- Sentimental reasons
- Unique gift ideas
- Repurpose old clothing
- Do not have enough to make a quilt
- Fandom
- Memory pillows
- Make memorable souvenirs
SUPPLIES NEEDED TO MAKE A T-SHIRT PILLOW
- T-Shirt
- Stuffing or Pillow Insert
- Matching Thread
- Fabric Scissors or Rotary Cutter
- Sewing Machine
- Fabric Marking Pencil
- Ruler
- Straight Pins
- Cutting Mat
How to Make a Pillow Out of a Shirt
The size of the pillow insert you need will vary depending on the size of the T-shirt. Measure the shirt first before you buy your pillow insert.
We find it easier to mark the cut lines before cutting. This ensures your pattern is centred, the pieces are square/rectangle, and the edges are straight.
How to make a pillow from a shirt:
- If needed, wash and iron the shirt to remove any wrinkles.
- Cut the first piece for the back of the pillow. On the front of the shirt, measure up from the hem. Using the hems of the shirt will make this project easier and quicker. Measure the width the same size as the pillow. Use ¾ of the measurement for the height. So, if you are using a 12” x 12” pillow insert, your measurement will be 12” wide x 9” high.
- Cut the second back piece from the back of the shirt using the same method. It will be the same size as the other piece.
- Cut the front piece of the pillow cover. You will cut this the same size as the pillow. So, if you are using a 12” x 12” pillow, cut the piece 12” x 12”. It is not necessary to add a seam allowance since the t-shirt material is stretchy.
- Lay the front piece face up.
- Take one of the back pieces and place it face down on the front piece. The seam should run across the middle and the opposite end should be matched up with the top of the front piece. Line up the unfinished edges with the edges of the font piece.
- Take the second piece and place it face down on the opposite side. Make sure that the finished seam is running across the centre of the pillow. The overlapping of the two back pieces creates the envelope.
- Make sure all the edges are lined up. Pin around all the edges to secure all the pieces together.
- Sew around the edges of the pillow.
- Flip the pillow cover right side out.
- Insert the pillow insert through the back “envelope.”
DO NOT THROW YOUR OLD T-SHIRTS AWAY. INSTEAD LEARN HOW TO MAKE A PILLOW OUT OF A SHIRT TO MAKE FUN AND UNIQUE PILLOWS.
Do you have an old t-shirt lying around that you cannot get rid of? Here’s a fun idea for how you can get more use and ‘wear’ out of an old t-shirt that no longer fits, or is just too old, or perhaps it has a stain or a tear.
You can also make some of these fantastic 16 t shirt quilt patterns.
Do not shove it in a drawer and forget about it. Pull out your sewing machine and learn how to make a pillow out of a shirt.
In case you want more pillow ideas, here’s 32 Crochet Pillow patterns and 21 Pillowcase patterns.


