If you have a frame that is not ready to hang, you may be wondering how to hang a picture with wire. Today, self-adhering strips are all the rage, but they are not suitable or safe for hanging heavy frames. Over time, if not almost immediately. they can come off the wall leading to damage to your picture.

When hanging a picture, you will want to use sturdy hardware and picture wire. This will help to ensure that your frame is safe and secure. Whether you are looking to hang a family photo or an expensive piece of artwork, you need to know how to hang a picture with wire.

Framed photographs and paintings are a great way to add your personality to a room. But if you do not know how to hang a picture them correctly, they can be an eyesore. If you know the proper techniques for hanging a frame, you can tackle the project with confidence.
Steps on how to hang a picture with wire

1.Find the Perfect Location
The first thing you want to do when hanging a picture with wire is to find the perfect location. You should not hang a picture on any free spot on the wall. Instead, look at several different locations.
Have a friend help you by holding up the frame. This way you can see what it will look like hanging on the wall.
Tips for finding the perfect location:
- Do not hang a picture in direct sunlight.
- Do not hang a picture where there is high humidity.
- A group of pictures should be treated as one unit.
- The centre of the frame should be at eye level. This is approximately 60” above the floor.
- If you are hanging the picture above your sofa, leave a gap. There should be at least 3 to 6 inches.
- If you are hanging the picture above a table, the gap should be 4 to 8 inches.
- If possible, hang your picture in a stud.
- Once you find the perfect spot, place a piece of painter’s tape on the wall along the top edge of the frame. Span the tape the entire length.
2. Gather Your Materials
Once you have found the perfect spot, you will need to gather your materials. You will need:
- Picture Wire
- Hardware
- Screwdriver
- Hammer
- Wire Cutters
- Needle Nose Pliers
- Tape Measure
- Pencil
Types of Picture Wire
There are 3 major types of picture wire; they are:
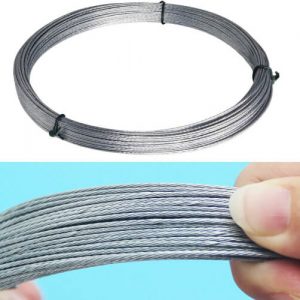
Braided wire is made from galvanised steel wires that have been braided together. It is available in different thicknesses. The heavier the picture, the thicker wire you will need. It can be used for hanging pictures that weigh up to 36 pounds.
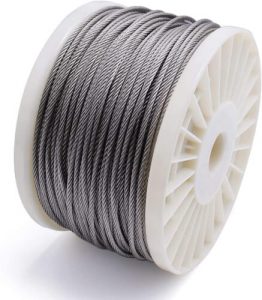
Stainless steel wire is made up of thin strands of steel that are twisted together. This type of picture wire is tougher than braided wire. However, it is not as flexible. It is used when hanging very heavy frames. It can be used for hanging pictures that weigh up to 100 pounds.
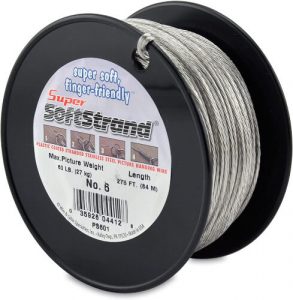
Vinyl-coated wire is easier to work with. It has a soft outer layer that is less abrasive and easier on your hands. It can be used for hanging pictures that weigh up to 60 pounds.
Choosing the Proper Hardware
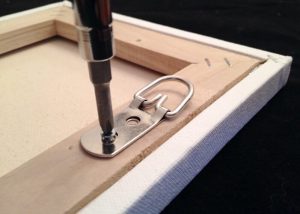
The framing hardware is vital for properly supporting your picture frame. Knowing the function and limits of the different types of hardware will help ensure your picture is properly supported.
- Screws
Choose the correct screws for your frame. There are metal screws for metal frames and wood screws for wood frames.
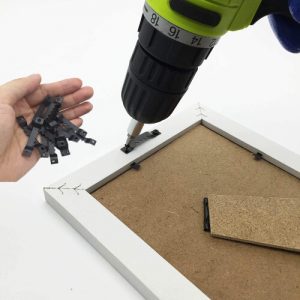
We do not recommend that you use a sawtooth hanger. These are the most common types of hangers you will find on picture frames. They are strips of metal with a jagged edge.
Even though these are very common, they are not strong. The metal is often weak and the hanger is only fastened onto the frame with small tacks. Never use the type of hanger for a heavy frame.
We do not recommend that you use screw eyes. Screw eyes are another common piece of hardware that you will find on picture frames. They have their purpose, but they cannot handle heavy frames. The screw eyes are weak at the neck and can be easily broken. They also pull out of wood easily.
- Steel Plates
Steel plates are a great choice when hanging a picture. They will have either two or four screw holes. The two-hole style can support up to 50 pounds. The four-hole style can support up to 100 pounds.
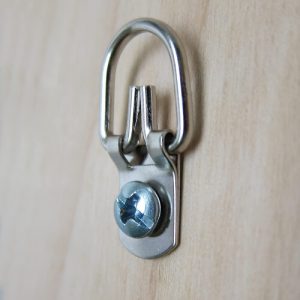
D-rings are dependable and were designed to be used on wood frames. They can often be found in light, medium and heavyweight. Being thin, they can lie flat against the picture frame. They can also be positioned at a 60 degree angle. This is recommended when learning how to hang a picture with wire.
3. Preparing the Picture Frame
After you found the perfect spot and chosen the appropriate picture wire and hardware, it is time to prepare the picture frame.
- Place the picture frame face down.
- We recommend that you use either the steel plates or the d-rings. Determine where you want the hardware to sit. Your target should be about a quarter of the way down from the top of the frame. Measure both sides, so they are the equal distance from the top.
- Use your pencil to mark their locations. If you are using the D-rings, angle them so they are pointing upwards yet towards each other. Attach the hardware with the proper screws.
- Measure and cut the picture wire. The wire should be twice the width of the picture frame. Insert approximately 5 inches of wire through the front of one hardware loop. Take the short 5 inch end of the wire and pull it up and over the long wire. Leaving some playroom to create a loop.
- Insert the short end of the wire back through the backside of the hardware loop. As you do this, you will create a loop in the wire. Thread the wire through the loop you just created. Now pull it tight. This will help secure the wire. Use the needle nose pliers to twist the short wire around the long wire.
- Locate the centre of the frame and pull the wire towards the top. Stop approximately 2 inches before you reach the top. Continue to hold the wire in this location while threading the other end of wire through the second piece of hardware. Cut the excess wire off, leaving an extra 5 inches.
- Secure the extra 5 inches of wire to the second piece of hardware just like you did on the first side. Take the extra 5 inches of wire and pull it up and over the long wire.
Insert the short end of the wire back through the backside of the hardware loop. Thread the wire through the loop you just created. Now pull it tight. Use the needle nose pliers to twist the short wire around the long wire.
4. How to Hang a Picture with Wire

Now that you have the wire secured to the picture frame, it is time to learn how to hang a picture with wire.
- Using the painter’s tape as your guide, measure down 2 inches from the centre of the tape. Make a small mark on the wall with your pencil. This is where you will install the nail or picture hook. Hopefully, this is in a stud.
- Hammer the nail or picture hook into the wall using the guide mark. If you are using a nail and did not hit a stud, you will need to use a wall anchor and screw.
- Hang the picture by draping the wire over the nail, picture hook or screw. To prevent damage to your frame and the wall, you can use self-adhesive rubber bumpers. Simply apply them to the back of the frame on the bottom corners.
- Remove the painter’s tape and level the picture.
How to hang a picture with wire made simple with these steps.
This is just one common method for hanging a picture with wire. After doing a lot of research, we have found that this technique is the best way how to hang a picture with wire.
Looking for more craft-related projects and tutorials, here is our tutorial on How to Fix a Zipper and How to Fix a Broken Metal Bracelet. We have lots of crafting activities you can check out here!

