Blankets are often described as something ‘comfortable’. But did you know that there really is a kind of blanket that is backed by science for its ability to bring comfort? In this How to Make Weighted Blanket Tutorial, we will teach you how to make this!

WHAT IS A WEIGHTED BLANKET?
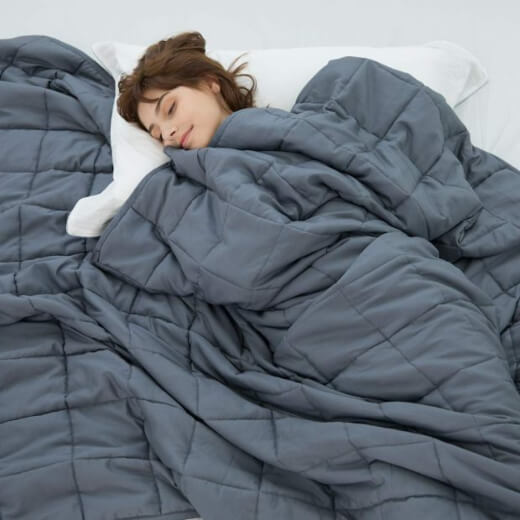
From the word itself, a weighted blanket is simply a heavy blanket. The blanket is filled with weighted materials, like pellets and plastic.
The weight of these materials brings a deep touch pressure (DTP) effect or a deep pressure stimulation (DPS) that can result in a serene and calming effect.
Insomnia and anxiety are illnesses that would often require medications to regulate. For a more natural alternative, one could try using a weighted blanket.
You might think, “Huh?! How could a simple blanket help with these when it even needs years of therapies to alleviate?”
Well, the science behind this is the idea of being “held”. This basic human behavior is supported by clinical studies which says that touch stimulates points in the body that directs the brain to produce serotonin.
Serotonin regulates the different brain functions. The more serotonin you have, the better your sleep and mood is!
Ready to start this stress relieving blanket? Continue below for instructions to make your diy weighted blanket!
LEVEL OF KNOWLEDGE IN SEWING
Even though you will only be sewing simple straight lines for this project, it is still best suited for intermediate sewers because the weight of the blanket will need significant attention.
MATERIALS IN MAKING THE WEIGHTED BLANKET
- Durable fabric
- Stuffing beads for the weight – Make sure to use plastic filler beads for this project in order for the blanket to be washable
- Scale
- Scissors
- Ruler
- Marking tool or tailor’s chalk
- Pins
- Thread
- Sewing machine – Use a thick needle and make sure that your sewing space has extra space to help support the blanket’s weight as you make it.
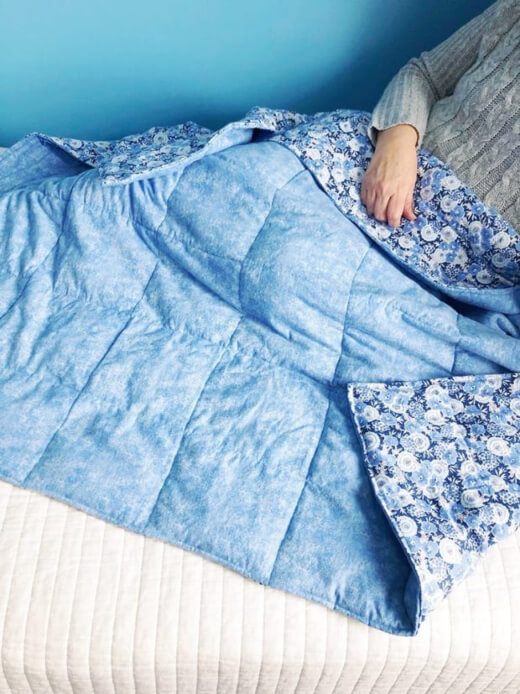
How to Make a Weighted Blanket for Anxiety by Lindsay
MEASUREMENT OF THE BLANKET
Before you start doing the blanket, think about who will use it first – this will be the basis of your blanket’s size. Your weighted blanket doesn’t have to be quilt or comforter size…
The main purpose of this blanket is to cover the person who will be using it.
Next step, decide and determine the sizing of the squares that are to be filled with the weighted stuffing. The approximate sizes for this are around 3 to 5 inches.
The cuts measurements have to be a multiple of the size of the squares, then add 4 inches. If you have decided make a 29 inches wide by 54 inches high blanket using 5 inch squares, use this formula 5 x 5 = 25 +4 for the width and this one for the height 5 x 10 = 50 + 4.
WEIGHT OF THE BLANKET
Usually, weighted blankets have to be about 10% of the weight of the user’s body. Though it depends on the preference of some; others might like it to be a little heavier.
Ideally, if you’re making it for a child with special needs, you need an approval to his/her occupational therapist to ascertain the best weight for their treatment.
Same thing goes with adult patients, to defeat uncertainty, consult their therapist.
Once you’re certain about the absolute weight of the blanket, convert the weight to ounces then subtract the weight of the fabric. Finally, divide the result by the decided number of squares in the blanket.
This is how we determine how much weight goes in each of the squares. [Weight of the whole blanket (oz) – Weight of the fabric ONLY (oz)]/Number of squares
For the measurement of the weighted pellets to be accurate, make use of a kitchen scale to figure out the volume of the pellets needed in each square. One ounce is approximately 1/4 of a cup.
How To Make a Weighted Blanket Step by Step Instructions
Once decided on the material, measurement and weight of the blanket, it’s now time to start making your very own weighted blanket.

Step 1: Sew both the front and the back of the blanket together
Start with making 2″ marks from all sides of the project. Pick a side then measure and mark the square sizes you chose, starting from the 2″ mark.
Allow a 3/8 inch seam allowance as you sew the front and back pieces of the fabric with the right sides together. Sew the long sides first before the shorter side. Don’t forget to not sew the top!
Turn the blanket with the right side out. Open the seams. Do a topstitch 1/4 inches from the end, starting and ending near the open side.
Then starting 2″ from the same open side, sew from one end to the other on the 2″ mark you made earlier from the fabric edge.
Lastly, sew along the long sides and the bottom. At the beginning and the end, do a backstitch. The grid of the weighted squares will be included in the inner topstitching.
Step 2: Sew the vertical channels in the blanket
On the lines that you’ve marked, start sewing all the vertical channels. Start at the closed bottom edge. Do a backstitch.
Just over the line of the stitching that is around 2″ from the inner top stitch, start stitching. End it just a little above the top 2″ mark. Do a backstitch.
How to Make a Weighted Blanket by Mollie Johanson
Step 3: Start filling the channels with the weighted beads
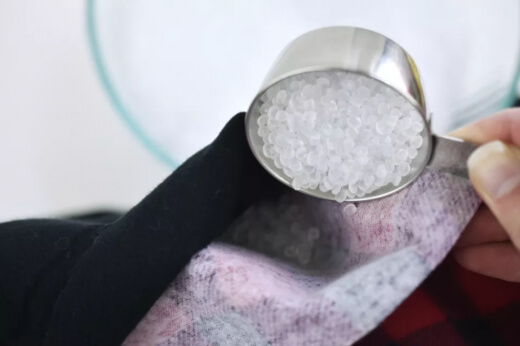
Weight the filler beads according to your earlier calculations. Fill each vertical channel with the beds then shake to bring down the beads to the bottom. Flannel fabrics tend to make this harder.
No worries in having some beads sticking to the channels!
Step 4: Horizontally sew across the channels that are filled
Once most of the fillers are at the bottom, do a second check. Feel the fabric for stray beads and push them down too. Keep the beads in place and at a distance from the marked line by using pins to create a line of basting.
This will help you avoid accidentally breaking your needle by sewing over one of the fillers. On the marked line, sew a horizontal line. Just on top of the line of the stitching that is almost 2 inches from the inner start topstitching, start stitching.
End it just over the inner topstitching on the other side. Don’t forget to do a backstitch at the beginning and the end too! While sewing the blanket, make sure that you are supporting the weight. Not doing so will pull the blanket.
As you work your way through, always fondle along the marked line for any stray beads. Push them out of the way. If it seems to be stuck, pause your work. Continue only after you have removed the bead from under the presser foot.
Do this over and over until you have filled every vertical channel. Close the vertical channels by sewing horizontally.
Step 5: Make a topstitch on the open part of the blanket
When you finally reach the peak, sew close the last row of squares. In doing so, you would meet the inner topstitching line – overlapping even.
On the open side, fold the edges around 1/2 inches. On the part where the topstitch ended on the sides, start and end a topstitch 1/4 inches from the edge.
For more blanket patterns, check out our T-shirt Quilt Patterns
Risk of a Weighted Blanket
While there are many benefits attributed to the use of weighted blankets, there are also risks. As a rule, healthy adults, teenagers, and older children should not have any issues using a weighted blanket.
Toddlers, older children, and those with developmental disabilities should not use a weighted blanket due to the risk of suffocation.
Weighted blankets are heavy. If they are too heavy, they can prevent movement. This can make it hard for people with certain preexisting conditions to breathe. These include asthma, sleep apnea, diabetes, and claustrophobia.
We always recommend you speak to your doctor before you use a weighted blanket. If your children are interested in using a weighted blanket, speak to their pediatrician first.
Safety Tips
- Do not use a weighted blanket on a child 2 years of age or younger. The weight and heat from the blanket can be fatal.
- The elderly and the young should only use a weighted blanket when they can be properly supervised.
- Use the appropriately sized blanket. The user should be able to move freely under the blanket. They should also be able to remove it on their own.
- Speak to your doctor before using a weighted blanket.
- Weighted blankets can be filled with different types of materials. People can have allergic reactions to the fillings.
- Discontinue the use of the blanket if there is a hole or the stitching has come loose. Have the blanket repaired or replace it.
What to Fill Weighted Blanket With
Weighted blankets get their extra weight from the fillings that are used. The extra weight can help people with sleep issues and anxiety.

Before you fill your blanket, take into consideration the pros and cons of each type of filling.
Micro Glass Beads
Micro glass beads are a popular weighted blanket filling. They have no rough edges and do not make rustling noises when moved around. They are tiny and sit densely inside a blanket.
This makes the blanket more luxurious and comfortable to use. Since the beads are so dense, the final blanket can lay flatter and be thinner. Micro glass beads are more expensive than some other weighted blanket fillers. However, since they provide a denser filler, you will need less of them.
Since glass beads are odourless and hypoallergenic, they are a good choice for people that suffer from allergies. But not all glass beads are made the same. Before you buy micro glass beads, make sure they do not contain lead or other toxic materials.
Pros and Cons of the Micro glass beads:
Pros:
- Non-toxic
- Environmentally friendly
- Hypoallergenic
- Quiet
- Washable
- Odourless
Cons:
- Can shift
- More expensive than plastic
Plastic Poly Pellets
Plastic poly pellets are one of the most frequently used weighted blanket fillers. They are smooth, but they can cause the blanket to be bumpy.
The pellets can make noise when the blanket is moved around. This can be an issue for people that have noise sensitivity issues.
Plastic poly pellets are often used to fill stuffed animals. They are an affordable option that can be found in craft stores, or you can buy large quantities online.
Plastic poly pellets are considered to be a safe level 5 plastic. They are a good option for people that suffer from allergies.
Pros and Cons of the Plastic Poly Pellets:
Pros:
- Safe Level-5 Plastic
- Hypoallergenic
- Washable
- Inexpensive
Cons:
- Bad for the environment
- Can smell
- Noisy
- Uneven weight distribution
Grains or Died Beans
There are several types or organic materials that can be used to fill weighted blankets. These fillers cannot be washed since they are porous and can grow mold and bacteria.
These fillers are low cost and are often used in handmade weighted blankets. You will not find these materials in commercially made blankets.
Since natural organic materials can grow mold and bacteria, they are not suggested for people that suffer from allergies. These materials can also attract insects and rodents.
Pros and Cons of Grains or Died Beans:
Pros:
- Natural
- Inexpensive
- Easy to find
Cons:
- Cannot wash
- Porous
- Can attract insects and animals
- Sharp edges
- Allergenic
Sand
People like to use sand as a filler for weighted blankets. It is thought to be organic. However, most purchased sands also include inorganic materials.
Blankets that are filled with sand cannot be washed. When the sand gets wet it can clump up making the blanket bumpy.
Sand is an inexpensive weighted blanket filler that can be purchased in many types of stores.
Since sand is very fine, it needs to be contained in plastic pouches before it is used to fill a blanket. If it is not contained, it can work its way through the fibres of the fabric. Sand can also grow mold and bacteria.
Pros and Cons of the sand filler:
Pros:
- Natural
- Inexpensive
- Easy to find
- Quiet
Cons:
- Cannot wash
- Can leak
- Allergenic
Gravel and Pebbles
Pebbles and river rocks are other fillers people like to use for weighted blankets. They do have rough edges that can snag the fabric, and they also make noises when moved around.
Some people like to use gravel and rocks because they can keep you cool.
Gravel and pebbles are inexpensive options. Since they are heavy, you will not need many to fill a blanket.
A blanket filled with gravel or pebbles is not a good choice for people with allergies. When it gets wet, it can grow mold.
Pros and Cons of the Gravel and Pebbles:
Pros:
- Washable
- Durable
- Hypoallergenic
Cons:
- Noisy
- Sharp
- Lumpy
Steel Shot Beads
Steel shot beads are often used as a filler for weighted blankets. They are smooth and durable. However, they are larger than glass beads and can be noisy. Steel beads can make a very comfortable blanket.
Steel shot beads are comparable in price to glass beads. However, they are more costly than plastic poly pellets. But since they are heavier, you will not need as many.
These beads are a good option for those that have allergies. But since they do make noise, they are not recommended for those with noise sensitivity issues.
Weighted blankets filled with steel shot beads are washable. However, you will want to make sure there are no issues with the seams.
Pros and Cons of the Steel Shot Bead:
Pros:
- Natural
- Inexpensive
Cons:
- Cannot wash
- Allergenic
- Noisy
- More costly than plastic
- Can fall into corners
- Not as easy to find in stores
Summing-Up Our How to Make Weighted Blanket Tutorial
Making a weighted blanket from scratch may consume your time and effort… but think about those good night sleep that you’ll be having after!
Also, think about your loved ones if you give this to them as a gift. A weighted blanket will play a big role in the daily lives of those people who needs it.
These includes people who are having trouble sleeping. As well as kids or adults who require special needs and attention.
A blanket such as this is not only for snuggling and keeping you comfortable all night long. In the long run, it will help with autism, sensory processing disorder, anxiety and even depression symptoms.
If you’re feeling these symptoms or know someone who suffers from these, make sure to recommend a weighted blanket for them. Better yet, send this how to make weighted blanket tutorial to them.
If you want more crafting ideas, we have tons just for you! Now that you have your blanket, pair it with these 21 Pillowcase patterns.
Start waking up from a nice and comfortable sleep – follow our how to make weighted blanket tutorial now!


