Thinking of a special and exceptional present for a friend, a family member, or a partner? Willing to exert effort and time to express your love? If you think that clothes, perfumes, accessories, and chocolates are too common to give, learning how to sandwich a quilt perfectly is perfect for you!
You do not need a machine to make one. You just need your hands!
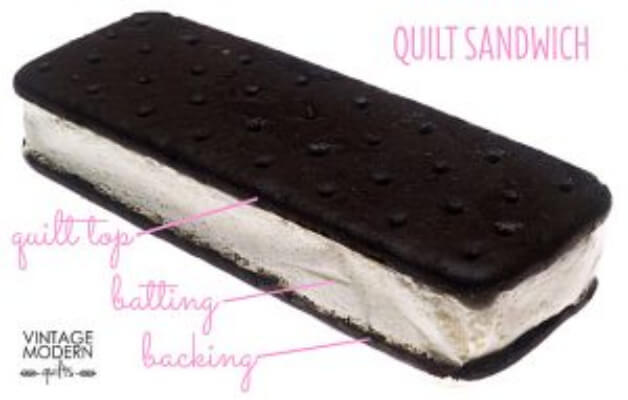
Choosing the Right Batting by Connie Smith
How to Sandwich a Quilt Perfectly
A quilt sandwich is what quilters call the three layers of a quilt. What are those? How do you do it? Is it hard? Here are the answers to your questions:
THREE LAYERS OF A QUILT SANDWICH
- quilt top or top fabric
- batting or the layer of insulation between fabrics
- backing or the bottom layer of the quilt
Special instructions before starting:
- Prepare the batting which serves as the mayo on your sandwich. Spread it over a surface and let it stand still for a while. Putting it in a dryer can help work off unwanted fibers (low for 20 minutes).
- Get the backing and the quilt top ready for ironing to avoid bumps and wrinkles in the end. Do this by pressing.
Two Methods of Making a Quilt Sandwich
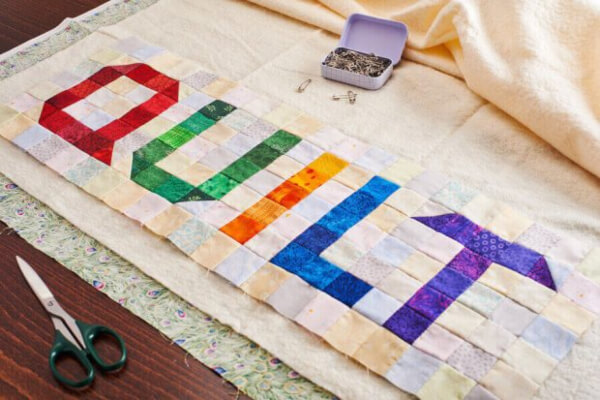
What Is a Quilt Sandwich and How Is It Assembled? by Stitcher’s Source
Method 1: Using Only a Flat Surface to baste
A flat surface, either the floor or a table, is needed in this method.
- First, lay down the backing facing down and spread it over the surface.
- Then, use a painter’s tape to attach it on the spot where it is laid down. This helps to avoid it from moving and producing wrinkles while quilting.
- Next, get the batting. Lay it over, and place it at the center of the stable backing, then flatten it out.
- Lastly, take the quilt top and place it at the center of the batting facing up, the same way you did with the batting, then smooth it out until there are no more bumps visible.
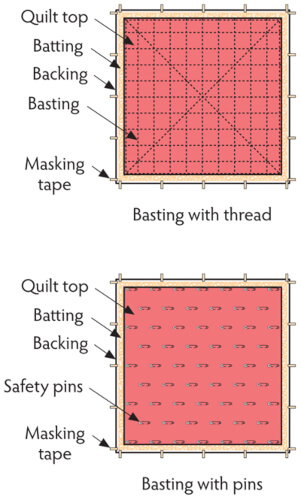
Tutorial – making a quilt sandwich by Robin Strobel
THREE TECHNIQUES TO BASTE TOGETHER
Thread Basting
Here, you have to use a needle and a long piece of thread.
- Start to sew large stitches from the center to the bottom of the quilt.
- Then, go back to the center and work your way up to the top, then to the left, and to the right.
- Make sure to fill in the spaces in every quadrant with stitches, always starting from the center out. It helps the layers become immovable during the quilting process.
If you want to know more about basting, check out this tutorial: 2 Ways To Do Baste Sewing
Note: Most quilters suggest to make the spaces between stitches no longer than 6 to 8 inches, but it still depends on the batting that you use are using.
Safety Pinning
In this technique, all you need are safety pins.
- Again, start pinning from the center to the top, center to the bottom, left, and right, until all the four edges are occupied. The distance between the pins is totally up to you.
- Lastly, fill all the open spaces available
Basting Spray
You have to shell out some money for this kind of spray, but it is nevertheless the easiest and fastest technique amongst the three.
You can start spraying anywhere– in the middle, top, or any edge part of the quilt. The spray temporarily glues the layers together. Though it can make your hands sticky, the glue can easily be washed out when you are done.
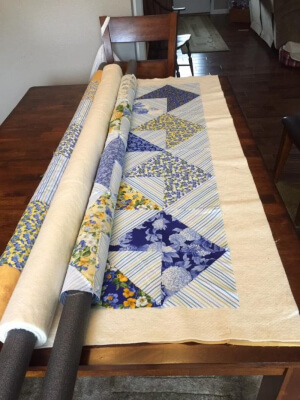
Photo by Sharon Cox Vest
Method 2: Rolling the Quilt
To make the layout look perfectly centered, this method seems to be the better one. You just need three or more dowels (either pool noodles or plumbing insulation). If you want, you can also use a tape to make the layers attached to the dowels and to keep them in place while rolling them up.
- Take the backing and the first dowel, then start rolling it slowly with the backing facing the dowel. You have to do it carefully to avoid having it wrinkled when it is finished.
- Do the same process with the batting and the quilt top. But for the quilt top, make sure that it is facing the opposite of the dowel.
- After doing so, unroll first the backing (8 to 10 inches) on a flat surface.
- Then, lay the batting on the backing and start unrolling it (6 to 10 inches). You should end up seeing the batting dowel on top of the backing dowel.
- Put the quilt top, facing up on the batting, and unroll it (4 to 6 inches) until all the dowels are pretty close to each other.
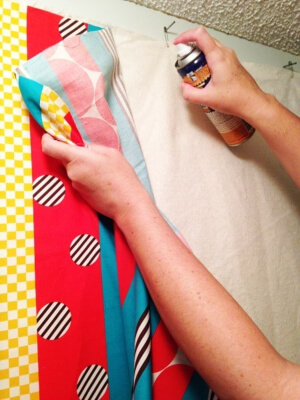
How to Wall Basting by Becky of Patchwork Posse
Finishing the sandwich
If you have it accomplished, you can now choose and start the technique which you think works the best. Then, continue rolling them until they reach the edges and are completely spread over. Finish the process, and it is all done! It just takes practice and you can master and even perfect it!
For more quilting projects, check out our Trip Around the World Quilt Pattern, Handy Quilted Laptop Bag Pattern, Wedding Quilt Patterns and Dog Quilt Patterns.
Now You Know How to Make a Quilt Sandwich
You can choose or make the design you want or the size you prefer. Aside from making one as a gift, you can start doing it as a hobby, or better yet, a business! So, what are you waiting for? Prepare the materials, call a companion, and try How to Sandwich a Quilt Perfectly now!


