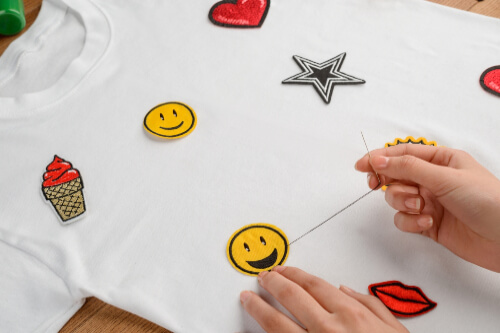
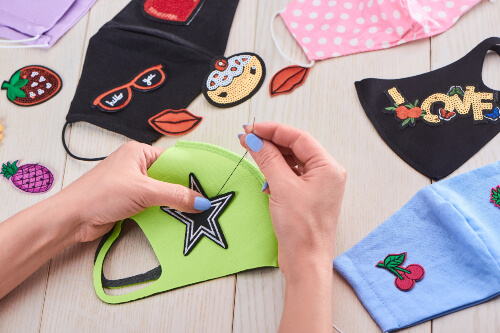
Learning how to sew a patch onto clothing and accessories is a fantastic way to mend and personalise items. Whether you need to fix a hole or add a decorative element, sewing a patch is a simple DIY project. Below, I will guide you through the step-by-step process of how to sew on a patch, and the benefits.
Benefits of Using a Patch
Sewing on a patch offers several benefits. These include:
- Repair and Reinforcement
Patches are an excellent choice for mending holes and reinforcing worn-out areas. By sewing on a patch, you can extend the life of an item.
- Save Money
Sewing on a patch is an affordable way to update your clothing and accessories. Instead of throwing out old items and purchasing new ones, sew a patch.
- Personalisation
Sewing on a patch is a fun way to customise your clothes, jackets, and accessories. You can show off your unique style and interests. You can mix and match different patches to create unique, one-of-a-kind items.
- Easy to Apply
Sewing on a patch is relatively simple. This makes it a great choice for anyone with basic sewing skills.
- Durable
A sewn on patch can provide a strong and durable bond. This helps to ensure your item can withstand regular wear and tear. Sewn on patches can also withstand frequent washing.
- Identification
Patches can be used for identification purposes. They are popular for keeping track of children’s clothing and backpacks. Patches can also be used to identify clubs, teams, and organisations.
- Sustainability
By sewing on a patch instead of throwing items away, you are helping reduce waste.
How to Sew on a Patch
Sewing a patch is a fantastic way to personalize and update your favourite items. Whether you need to mend a hole or add a decorative element, knowing how to sew a patch will definitely come in handy.
Below are step-by-step instructions on how to sew on a patch.
Gather your materials:
- Patch
- Garment or Accessory
- Needle
- Thread
- Straight Pins
- Scissors
- Thimble (optional)
- Positioning the patch.
- Pin the patch to temporarily secure it in place.
- Double thread the needle and knot the end. Trim off the excess thread after the knot.
- Start sewing the patch from the inside of the garment or accessory. This will help hide the knot.
- Bring the needle up and down through the fabric and the edge of the patch. Make small, even stitches that are close together.
- When you reach the end, securely knot the thread on the inside of the item.
Tips for Sewing a Patch
Here are a few helpful tips for how to sew a patch.
- Choose the right thread.
Choose a thread that matches the colour and weight of the patch and fabric. You can also use a contrasting thread if you want the stitches to be visible. You will want to use a strong and durable thread, such as polyester or cotton.
- Secure the patch.
Before you sew the patch, secure it in place using pins, fabric adhesive, or basting stitches. This will help prevent the patch from shifting during the sewing process.
- Use the right needle.
Use a needle that is appropriate for the fabric you are sewing. In most instances, a universal needle will work. However, for thicker fabrics, you will need a larger needle, while delicate fabrics may require a finer needle.
- Plan your stitches.
Before you begin, plan out your stitches. Decide on the stitching pattern you want to use. Do you want the stitches to be invisible? Or do you want them to add a decorative element?
- Consistent length and tension.
You want to maintain a consistent stitch length and tension. This will make the patch look neat and more professional.
- Knot the thread securely.
Make sure you knot the thread securely at the beginning and end of your project. Doing so will help prevent unravelling.
- Practice
If you are just learning how to sew on a patch, practice on a scrap piece of fabric first. This will help get comfortable making the stitches.
Frequently Asked Questions About How to Sew a Patch
Is it easy to sew a patch?
Sewing a patch is a fairly easy process that only requires basic sewing skills and a little patience. With practice, you can easily master the technique and make clean, secure stitches.
Can I sew on an iron on patch?
Yes, you can sew on an iron-on patch. Iron-on patches are designed for easy application using heat. However, sewing a patch will help to ensure that it stays in place. The combination of heat and sewing provides a strong and long-lasting bond.
What stitch should I use to sew a patch?
There are several types of stitches you can use to sew a patch. The stitch you use will depend on your desired look and the type of fabric. When learning how to sew a patch, the easiest stitch to use is the straight stitch. Other popular choices are the whip stitch and the blanket stitch.
Are iron on patches better than sew on?
Iron on patches and sew on patches are both great choices. When deciding between the two, you will want to consider fabric and longevity. Sew on patches that are long-lasting and can stand more wear and tear. While iron on patches are easier to apply and offer a cleaner look.
Do you sew a patch inside or outside?
You can sew a patch on the inside or outside. The location will depend on your personal preference. Applying the patch to the outside can add to the overall look of your garment. While sewing a patch on the inside can help hide repairs.
Hope you had fun learning how to sew a patch
If you enjoyed this post be sure to check out some of our sewing tips articles below or do check our Facebook Page for sewing patterns.
- How To Sew a Hole
- Scrap Fabric Projects
- How to Use a Rolling Hem Foot
- How to Sew A Knitted Sweater Together
Whether you are repairing a pair of jeans or personalising a jacket, sewing on a patch is a rewarding sewing technique to learn. Not only does a patch allow you to extend the life of your favourite, but it also gives you a creative outlet to show off your individuality. By knowing how to properly sew a patch, you can achieve professional-looking results you will be proud to show off.


